How to Plant Perennials in Your Flower Garden
How to plant perennials in your flower garden? Well, this seems like a no-brainer and really elementary for a flower gardener! Yes, it does, but read on and you might just find out that the way you’ve been planting your new perennials may not be the best way.
For purposes of this post, we are planting herbaceous perennials that you purchase from the nursery or any store-bought perennial plants. We’re including instructions for planting bare-root perennials as well. We’ve already covered transplanting and dividing perennials in this post. We also are not talking about sun requirements in this post. It is however important to determine if your plant is a full sun, full shade, or somewhere in between and plant them in an appropriate space.
This post contains affiliate links. If you click on
one of the links and make a purchase,
I may receive a small commission at no additional cost to you.
See full disclosure here.
Need a little refresher on how to buy perennial plants from the nursery to get the biggest bang for your buck, see this post.
What to do With a New Perennial Before You Plant It
You’ve made a trip to the garden center and now you have one, two or maybe an entire carload of new perennials to plant. The first thing to do when you bring home your new plants is to water them well. You might even want to put a tray under them and let them soak up water from the bottom.
Depending on where you purchased your new perennial, it may be starved for water. When perennials are planted in those gallon-sized plastic containers, they are usually planted in a potting mix that is largely made up of peat moss and peat moss dries out rather quickly. That can cause the soil to shrink up so that when the container-grown perennials are watered at the garden center, most of the water runs out the bottom of the pot, leaving the middle where the root mass is located bone dry.
If you aren’t going to plant your newly purchased perennials right away, keep them in a shady spot, or a place that doesn’t get full afternoon sun, until you can plant them. Also, keep them watered.
The wrong way to plant a perennial is to bring it home from the garden center, dig a hole and plop it in. Sure your plant may do just fine, but for the best results, there is a right way. So, don’t get in a hurry! Wait until you can plant your new perennial the correct way.
Save this post to your Pinterest Gardening Board for later reference!
How to Plant Perennials – Preparing the Soil
Let’s talk dirt (a/k/a garden soil) for a minute. Ideally, newly planted perennials will do best in well-drained soil. If you have clay soil and it doesn’t drain the best, it’s a good idea to do a little research on perennials that do well in clay soil.
First, dig a hole 5 to 6 inches wider than the pot and prepare it for planting by adding in some compost or organic matter. The new plant needs to learn to grow in the soil in your gardens so you don’t want to completely replace the soil. In the case of my very sandy soil, I like to add compost when I’m planting. The makeup of your garden soil cannot be changed, but over time it can be improved upon. You do not want the hole any deeper than the pot, but it’s good to loosen up the soil at the bottom of the planting hole.
If you want to see if your hole is just right, place the plant in its pot right into the hole. Step back and take a look.
If your garden soil is dry, fill your freshly dug hole with water and wait for the ground to soak it up. Depending on the dryness of the soil, sometimes I will do this twice.
Preparing Your New Perennial for Planting
Next, gently remove the plant from the pot by supporting it with your hand as you turn it upside down. The key here is to be gentle. Some perennials have very tender crowns and they can snap off if you’re too rough. If the plant isn’t root bound, it will slide out easily.
If the plant is root bound or tight in the pot, lay the pot on its side on the ground and gently push in the sides of the pot. You can also simply cut the plastic container off of the plant.
The next thing to do is to rough up the root ball a bit. You can tell if the plant has been in the nursery pot for a while. The roots may circle the outside of the pot (like the picture above), or you may not be able to see much soil at all. If this is the case, take a hand garden rake and rake along the roots to loosen them up.
You may need to use a gardening knife (like this hori hori knife) to cut the roots apart. I know that sounds harsh, but perennials are resilient and the goal is that you want the roots of your new plant to spread out and take to their new environment.
My favorite set of heavy duty, hand held garden tools.
How to Plant Perennials – Now you’re ready to plant.
Place the perennial in the prepared hole, spread the roots out to the side as best you can and backfill with a mix of the soil you dug out and compost. Be sure the top of the soil in the pot is level with the surface of the soil. Planting depth is very important. You do not want the plant buried too deep or too shallow. Always check the plant tag for planting depth information. Gently pat the ground around the plant to settle the soil, but don’t step or stomp on it. The roots need good air circulation and not compacted soil.
Does a Newly Planted Perennial Need Fertilizer
If you’ve done any searching at all, you will find all kinds of mixed opinions on this topic. I’m sharing what I’ve found to work best from my 30+ years of gardening experience. So here it is! If you’ve amended your soil with organic materials or compost, it is not necessary to add any kind of fertilizer when you plant your new perennial.
Also, know that those perennials were fertilized a lot just to get them ready to go to a garden center to be sold. If I get around to it, I may apply a slow-release fertilizer to my perennial beds in the spring, or to transplants, but oftentimes I don’t get around to it and my perennials are happy and gorgeous.
I highly recommend sending a garden soil test to your local extension office if you’ve never done so. Getting your soil tested will let you know what nutrients are missing. Without knowing this, there’s no way to know what your soil is lacking and what kind of fertilizer will benefit your plants the most.
How to Water a Newly Planted Perennial
Again, there’s a right way and a wrong way to water perennials. The wrong way is to use the shower setting on your hose nozzle and water the new plant for a few minutes. I know, I know that’s the way plants are watered naturally with rain, but if you have to hand water you might as well do it the most efficient way. To do this, set your hose nozzle on the flood, full or soaker setting and water around the base of the plant. When you water, you want the plant roots to get most of the water, not the foliage. Watering this way will insure a good root system. This has nothing to do with diseases or scorched foliage, which are false myths but we won’t go into that here.
With newly planted or transplanted perennials, water out about 6-12 inches away from the base of the plant too. The idea with this is that you want the roots of the plant to start filling out to the sides, making the plant stable and feeling at home in its new place in your flower bed.
How Often Should You Water Your New Perennial
The right answer to this question is when it needs it. If your plant was wet when you planted it and the ground soil was moist, it may not need water for a few days, depending on the weather, sun and heat. It also greatly depends on your soil composition. Remember clay soil retains moisture and sandy soil usually has good drainage (sometimes too good).
The best way to tell if a plant needs water is to use your finger and dig down a couple of inches around the plant. If the soil is dry, then your plant needs water. You can use a moisture meter for this as well.
Check out this post to learn the most efficient way(s) to water your entire garden beds.

When is the Best Time to Plant a New Perennial
Cool temperatures and cloudy days are best for planting new plants in your gardens. So early spring and early fall tend to be the best seasons for adding perennials to your flower beds. That being said, most perennials are very resilient and will survive no matter when, during the growing season, you plant them.
How to Plant Bare Root Perennials
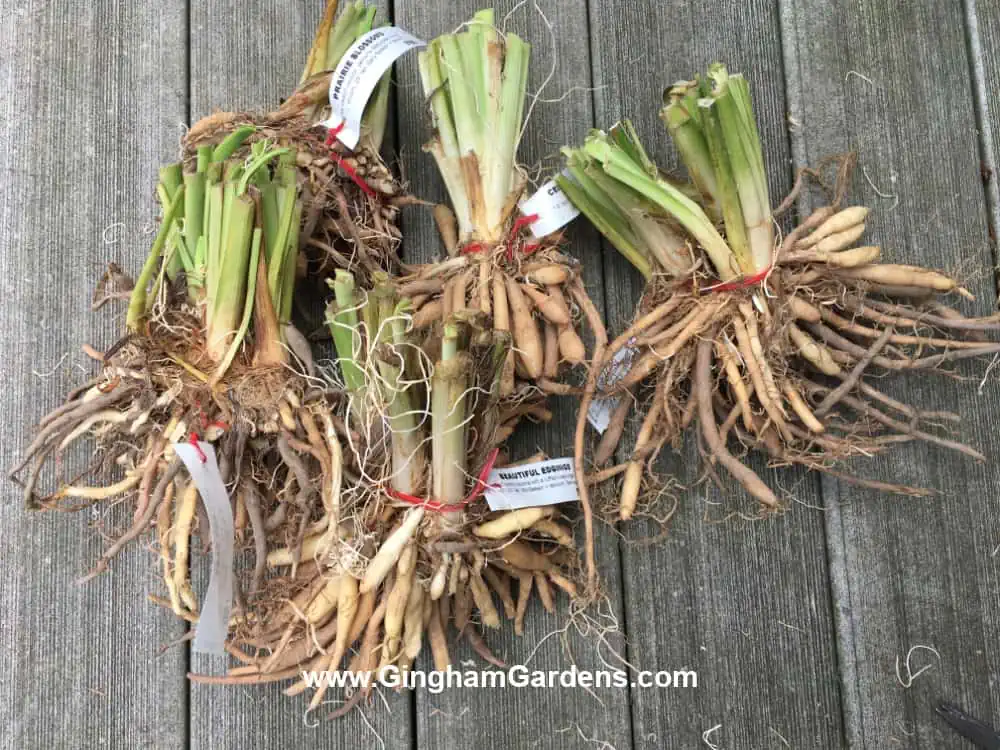
Many times when you purchase perennials online, they come bare-root. A good example of this is daylilies. I ordered lots of bare root daylilies from online daylily growers because I cannot find many varieties at our local garden centers. I like to soak them first for a couple of hours. The general planting directions are the same as above. If you purchase bare root plants from a reputable grower, then will include a planting guide. If you are new to planting bare root plants, always follow the grower’s instructions.
There are no perfect growing conditions for any perennial. But, if you start your new plants out the right way, you have a much better chance for beautiful, healthy plants. Just know that in the first year, you may not see much new growth on newly planted perennial flowers. That’s because their roots are busy becoming established. The following spring and summer, you’ll begin to see more growth and beautiful flowers. But typically it takes three years before you have mature plants.
Top off the soil around your plant with fresh, shredded wood mulch or shredded dead leaves. This will help the roots to stay cool and retain the all-important moisture that they need to grow. Mulch will also help to protect newly planted perennials during the colder winter months. As a side note, I recommend using shredded wood mulch over wood chips or synthetic-colored mulch.
If you’re a beginner flower gardener, you’ll benefit from reading Flower Gardening 101 and Flower Garden Design.
What did you learn in this post? Have you been planting your perennials correctly? Leave a comment below to add your experience.
Happy Gardening and DIYing,
Joanna
More Great Things on Gingham Gardens
Sign up to receive our weekly newsletters full of gardening tips. You’ll also get access to our Gardening Resources Library and all our helpful gardening printables.
More places to find Gingham Gardens:
- Visit Gingham Gardens on Pinterest.
- If you’re on Facebook, Gingham Gardens is also on Facebook.
- Stop by Gingham Gardens’ Amazon store!
- Love Etsy? Come see us on Etsy too.
Save a pin to your gardening board on Pinterest, so you can remember this post later:


