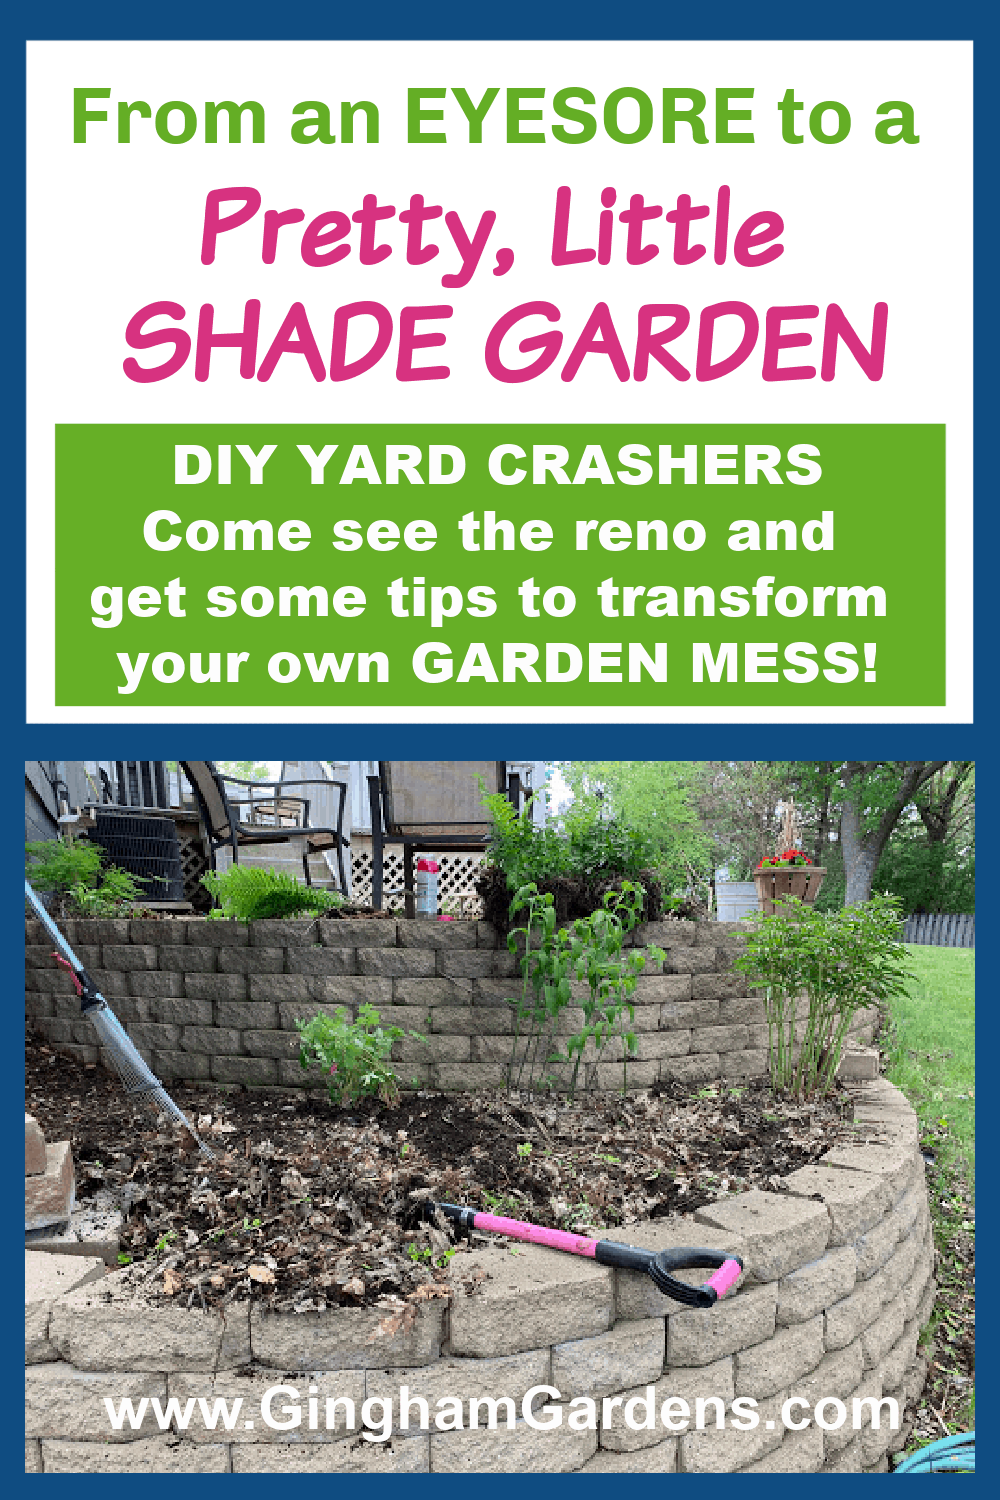
Small Shade Garden Transformation
One of my favorite gardening tasks is to makeover a gardening area. Since we moved into our current home in August 2016, I’ve been doing lots of garden makeover projects and I will share links to those at this bottom of this post. This area I’m about to show you turned into the cutest Little Shade Garden Transformation ever!
Little Shade Garden Transformation – Before
It’s sort of embarrassing to admit that I let this little area go while I was working on bigger projects over the past two summers. Plants that were in this little bed include:
- yellow lamium, a/k/a Herman’s Pride (some are invasive, these have been very well behaved)
- really nice little ferns
- some not so nice Ostrich ferns
- a peony
- solomon’s seal
- some walnut seedlings (compliments of the resident squirrels)
- lots of other random weeds
So not terribly hideous like some of the other gardens I’ve redone, just basically blah and no character at all.
This post contains affiliate links. If you click on
one of the links and make a purchase,
I may receive a small commission at no additional cost to you.
See full disclosure here.
Small, Low-Budget Garden Makeover
This is such a small area, so I didn’t really want to spend lots to make it pretty. I decided I would only buy a few packs of annuals, a few perennials and mulch to keep the budget low. That means I had to shop from my yard and borrow some hostas and shade plants from other gardens.
Garden Transformation – The Steps
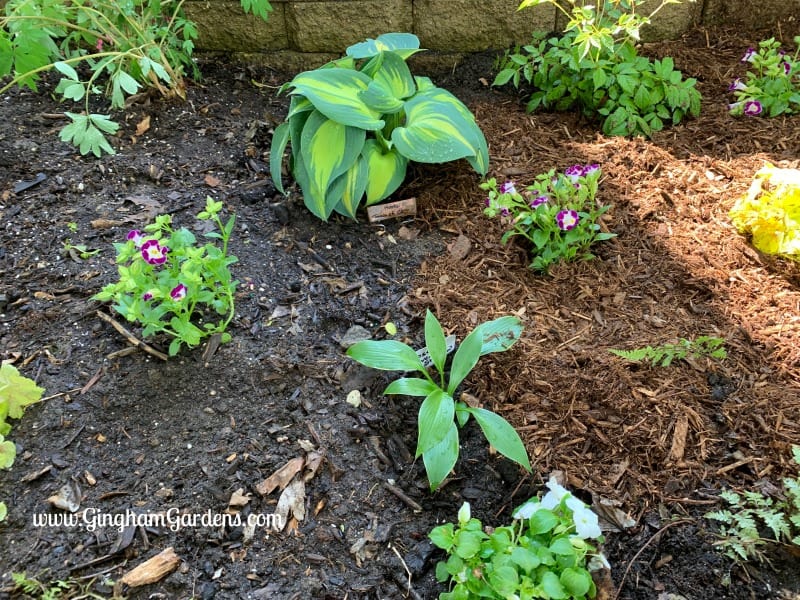
I like to start with a blank slate, so the first thing I did was dig all the plants and weeds out, with the exception of the peony. I will move the peony this fall, but it was about ready to bloom so I didn’t want to disturb it.
Next I filled in the holes with bagged compost and leveled the soil out. And, voila, I have my blank slate with which to design.
I could have (probably should have) taken the time to draw this bed out on paper, but since it’s so small I decided not to. Instead, I simply placed the plants where I wanted them to be planted. Then, I take a step back, see how everything looks and make any adjustments.
And now, I’m actually ready to plant. As a general rule of thumb when planting new plants, you want to dig your hole about twice the size of the root mass. Next, sprinkle in some slow release fertilizer (this stuff makes a huge difference) and mix it into the soil. If your soil isn’t the greatest its a good idea to add in some compost. Then place your plant into the hole and fill the soil in around the plant. Gently tamp the soil in around the plant.
Once all the plants are planted, they get a good drink of water. And, next comes the mulch. Spreading mulch isn’t really all that fun, but I love the end result – it’s just like icing on the cake! Look at the difference between the mulched area and the unmulched area.
List of Shade Plants Included In This Makeover
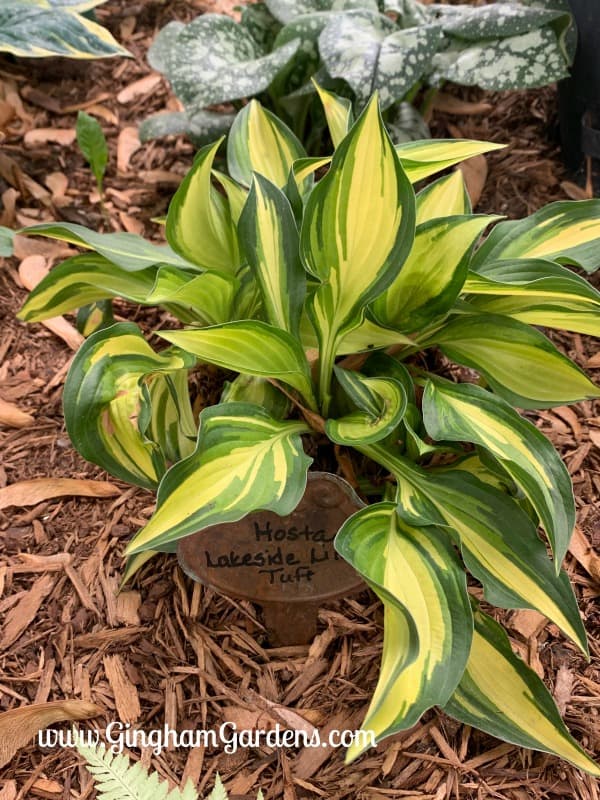
- Lakeside Little Tuft Hosta
- Halycon Hosta
- Sugar Daddy Hosta
- Touch of Class Hosta
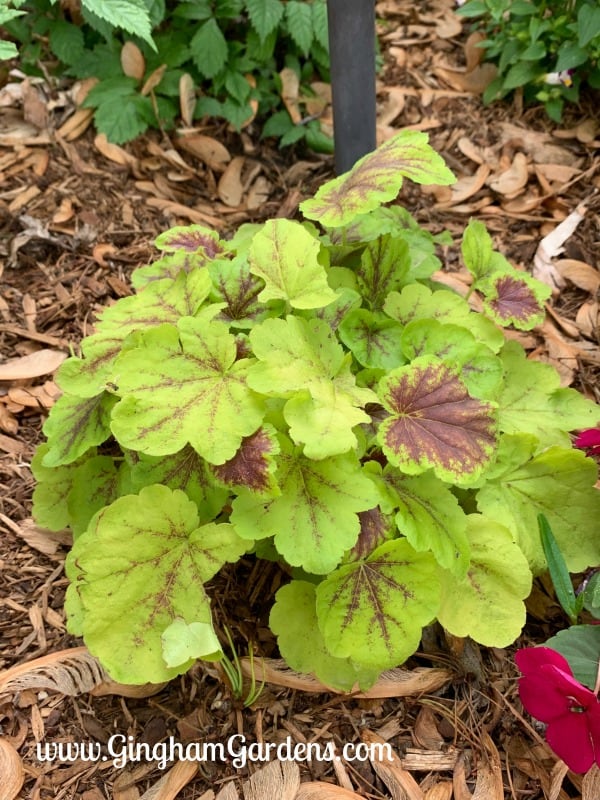
- 2 Solar Eclipse Foamy Bells (Heucherella)
- 2 Sugar Plum Coral Bells (Heuchera)
- Bleeding Heart
- Solomon’s Seal
- Bridal Veil Astilbe
- Pretty in Pink Pulmonaria
- the little ferns stayed
- Torenia
- Impatiens
Here’s Lakeside Little Tuft Hosta.
Solar Eclipse Foamy Bells
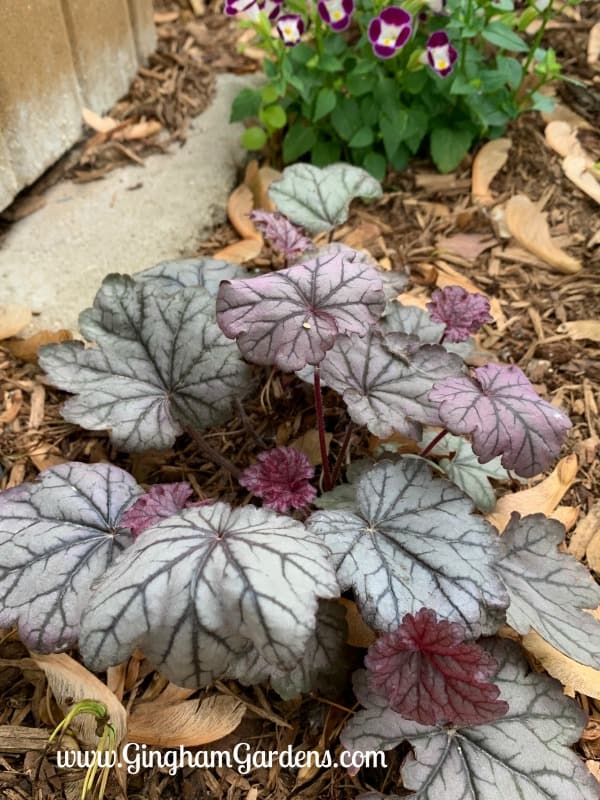
Sugar Plum Coral Bells
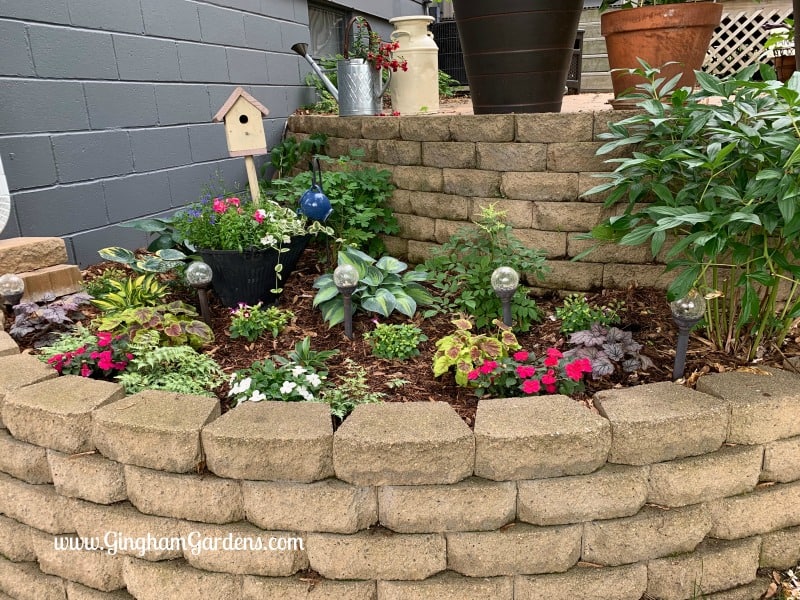
Small Shade Garden Transformation – After
Here’s the finished product- my Cute Little Shade Garden Transformation!

Another angle a few weeks later when the plants are settled into their new home and filling in beautifully.
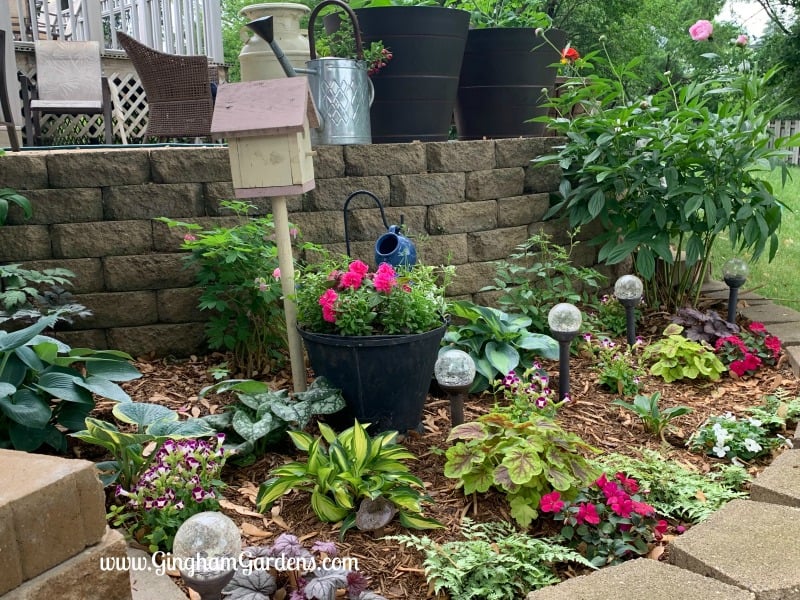
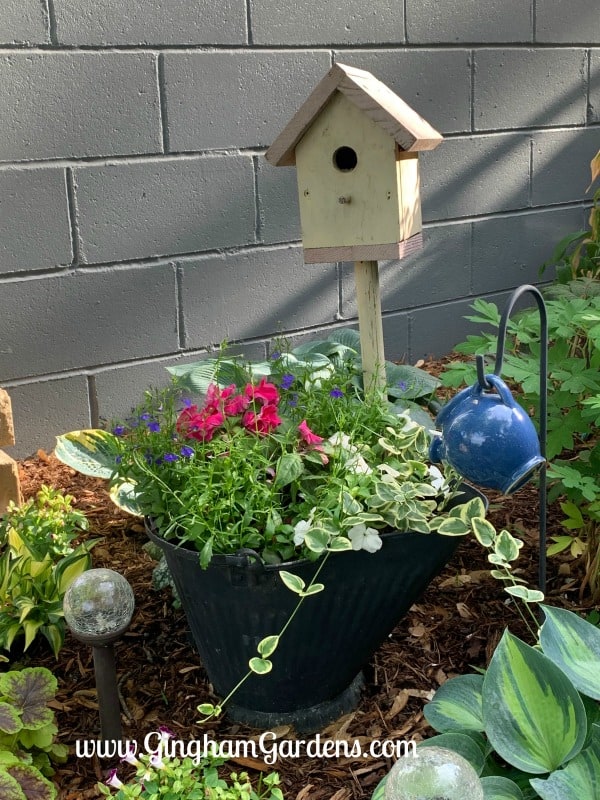
To add some character, I add in some decor pieces (or garden junk). I have an entire shed full of garden junk that I’ve collected over the years. Perhaps some day I’ll show you my garden shed full of garden junk… but, probably not.
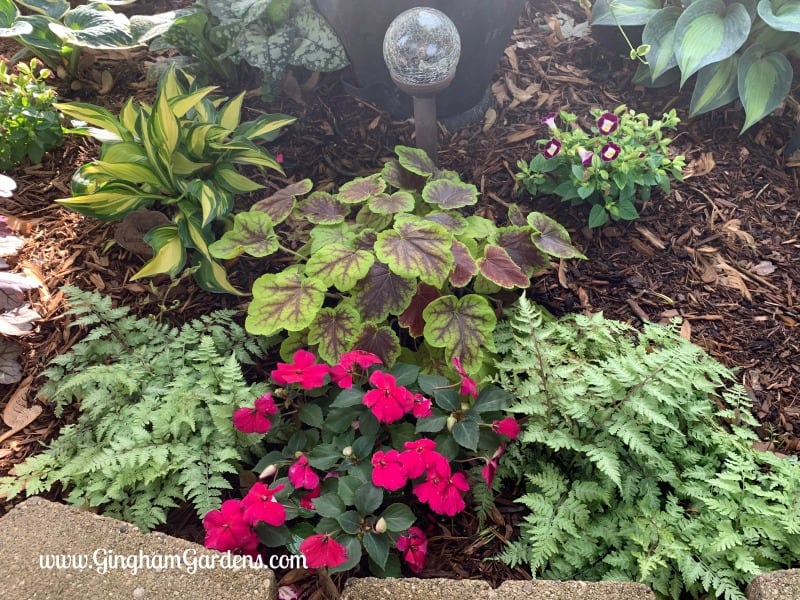
And, a close-up of a little grouping of plants looking all cozy and loving their new home.
And one more after. What a transformation! It’s amazing what plants will do when they are shown a little love.
Tips for Transforming a Small Garden Space
It’s easy to start with a blank slate. So, if your area has existing plants and weeds, get everything cleaned out. If you’d going to reuse plants, set them aside in the shade.
Once you have a blank slate, create a design. I highly recommend doing this on paper. Pop over to the Gardening Resources Library and print off a Garden Plans worksheet – it has a graph area to plan out your new flower bed and a place to write the plant names.
Before you start digging, place your plants according to the plan you drew, and then step back a take a look.
Now plant away. Don’t forget to add slow release fertilizer or amend the soil with compost as you plant. Give your plants a good drink and watch them grow. For more detail and instruction on Garden Design, pop over and read Flower Garden Design Tips.
Do you have a little area that could use a makeover? I encourage you to just go for it, garden transformations are so worth any effort you put forth.
Here are some of the other Garden Makeovers at Gingham Gardens:
Garden Makeover (From A Weed Pit to a Beautiful Garden)
Another Garden Makeover
Shade Garden Makeover
Flower Garden Makeover – Before and After
Thanks for stopping by Gingham Gardens today. I hope you’re enjoying your visit and thinking about ways you can transform a blah garden into a spectacular one. Leave a comment and let me know what you’re thinking about for your garden. And, as always, if you have a gardening question, be sure to ask in the comments section below.
Happy Gardening,
Julie
p.s. Go ahead and feel free to “pin” these pictures. If you hover in the upper left-hand corner of the picture, you’ll see the little Pinterest icon. Just click it and pin away.
p.p.s I’d love to have you follow me on Pinterest. Lots of great gardening ideas and tons of gardener’s eye candy.
Pins to Share: