Another Garden Makeover at Gingham Gardens
I think it’s time I shared another garden makeover at Gingham Gardens. When we moved into our current home at the end of summer 2016, the list of garden projects was endless, and it still is, but lots of the projects have been checked off. So far, we’ve managed about 4 o4 5 garden makeover projects – some big and some small. I will share links to those garden makeovers at the end of this post.
In reality, I started this project the day we moved in. There were movers and boxes all over the inside of the house and I just couldn’t deal. Plus, it was a lovely day and I really needed to stay out of the way. Good excuses, right?
This post contains affiliate links. If you click on
one of the links and make a purchase,
I may receive a small commission at no additional cost to you.
See full disclosure here.
Before the Garden Makeover
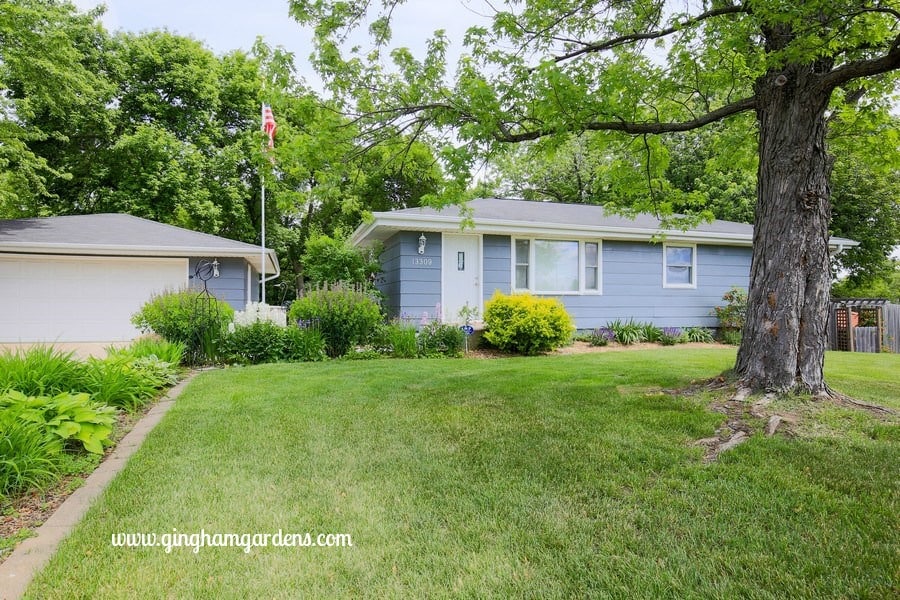
This area runs along our driveway, so it is very visible from the street. I hated it from the moment I saw it on the realty listing photos and I hated it even more when I saw it in person, but… I knew I could make it beautiful. One of my gardening pet peeves is seeing hosta planted in full sun. The poor shady plants just get burnt up by the time July rolls around, even in zone 4. For some reason lots of people think it’s okay, but I won’t go off too much on how crazy it makes me, because I don’t want to alienate my readers. This is the picture from the real estate listing. The flower bed on the left hand side of the picture is the one I made over here.
This is what the bed looked like before I started. Well really I worked a little and then decided to take some before pictures. See the moving trucks… and you thought I was joking.
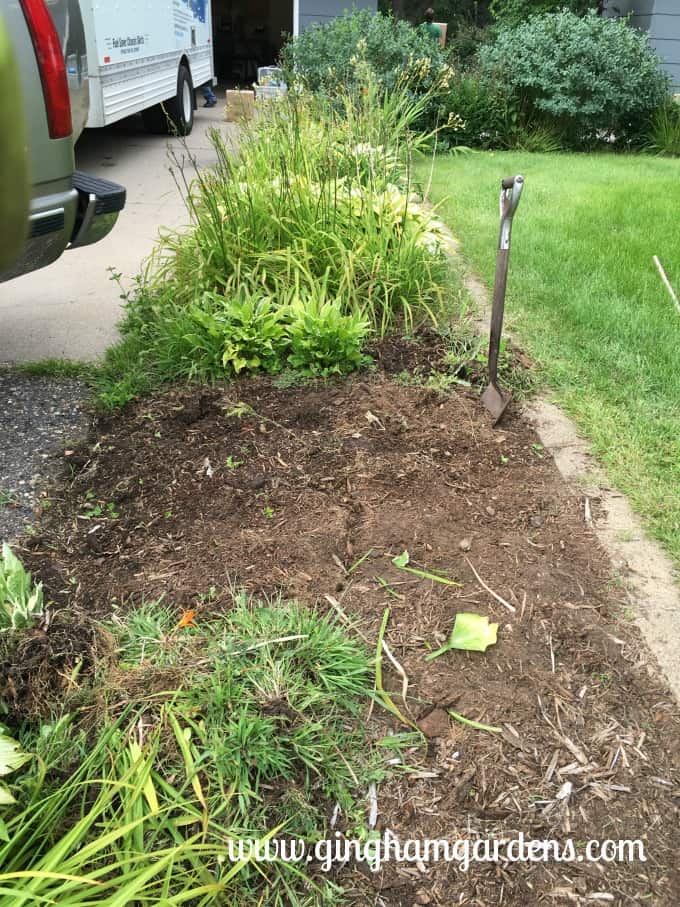
I dug out hosta, ditch lilies, blackberry lilies and tons of weeds. This picture also shows lots of other overgrown plants and shrubs that are gone now. Way over to the right, you can see a portion of the weeds in the foundation bed in front of the house. Always take lots of before and after photos. I really wish I’d taken more before photos. It’s just so nice to be able to compare the before and after.
So I have a confession to make, I pitched most of these plants. I had a huge pile at the end of our driveway and a few of the neighbors came and picked through it. A few of the hostas found a new home in the shade where they are very happy and thriving. Not to offend anyone, but I really dislike ditch lilies, unless they are in a ditch where they belong. And blackberry lilies, I just sort of like it, but it’s crazy aggressive. I’m still pulling lots of babies this year. Here’s a picture of the last of it. Not very pretty, right!
Flower Garden Makeover – After
After I got everything dug out. I filled the massive holes in with bagged compost, raked the area smooth and then covered it with broken down cardboard boxes (of which we had plenty). On top of the boxes I spread out shredded leaves and grass clippings. It was left that way for the winter. I failed to take pictures of that step, because at the time I wasn’t thinking about doing a blog post. I just wanted to put it to bed for the winter and be done with it. This is know as the “Lasagna Method”. The following spring my grunt man (hubby) tilled it for me. Overall, this method worked really well and I plan on doing it in some more areas of the yard this fall.
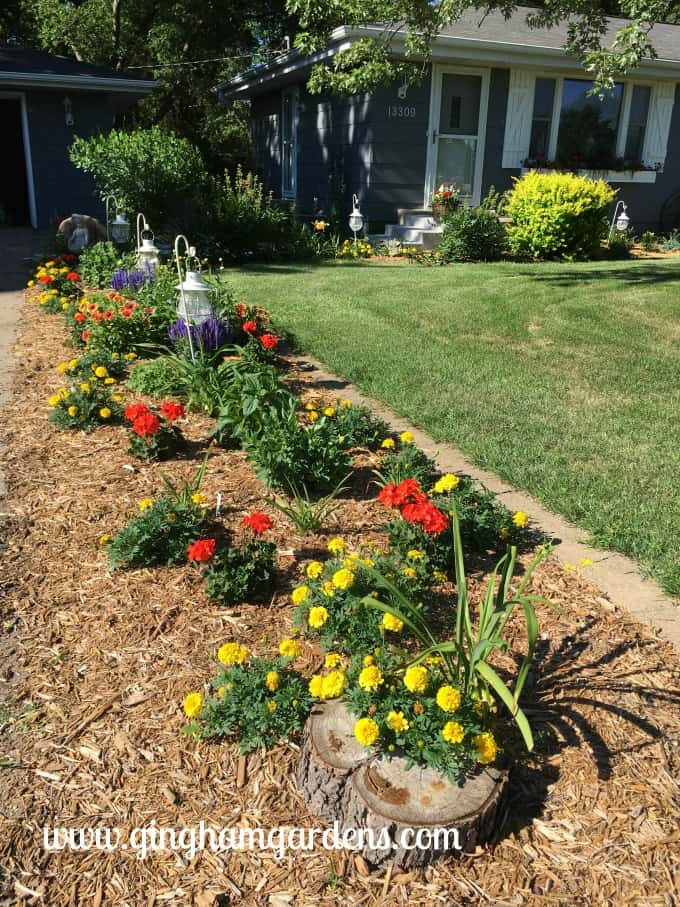
This bed was planned out a little more that some of the other areas I have planted, because I wanted it a little more structured, or as structured as one of my gardens can be. The perennials I planted are Becky Shasta Daisies, Royal Candle Veronica, Black-Eyed Susan, Autumn Joy Sedum, Karmina Geranium, South Seas Daylilies, Arizona Sun Gaillardia and Little Pleasures Daylilies. I then added in some annuals – Marigolds and Geraniums. I will be able to change the look by changing up the annuals every year. Here is a picture taken early in June just a week or so after I finished planting and mulching. You’ll also be able to see the difference with the other overgrown shrubs removed.

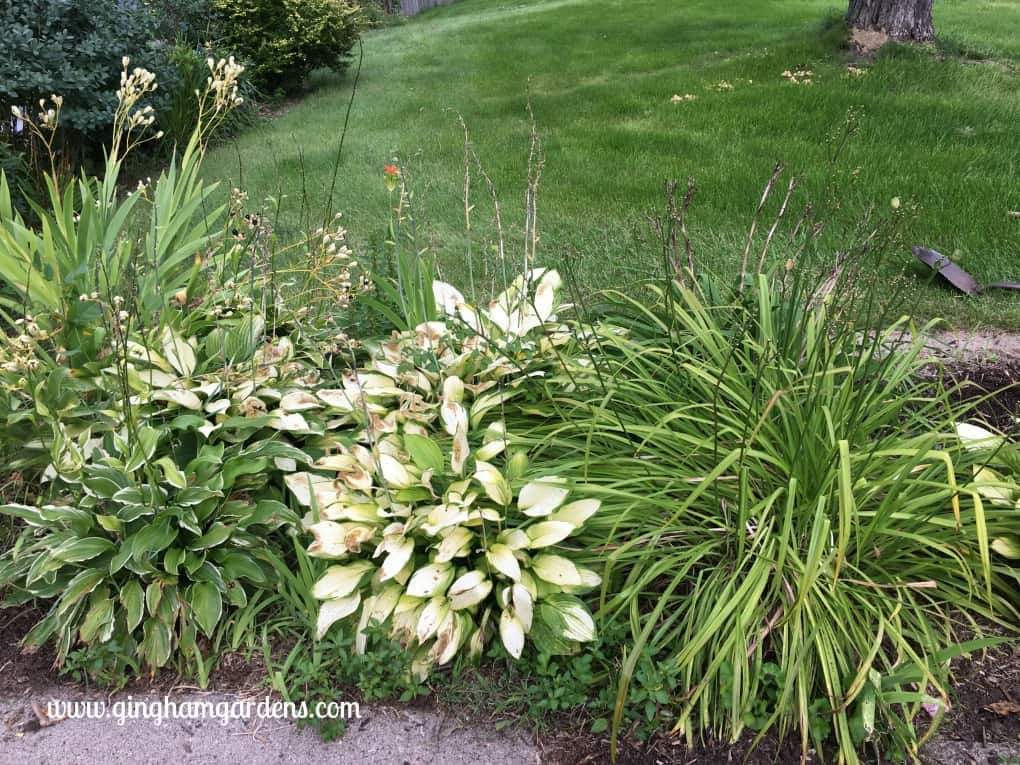
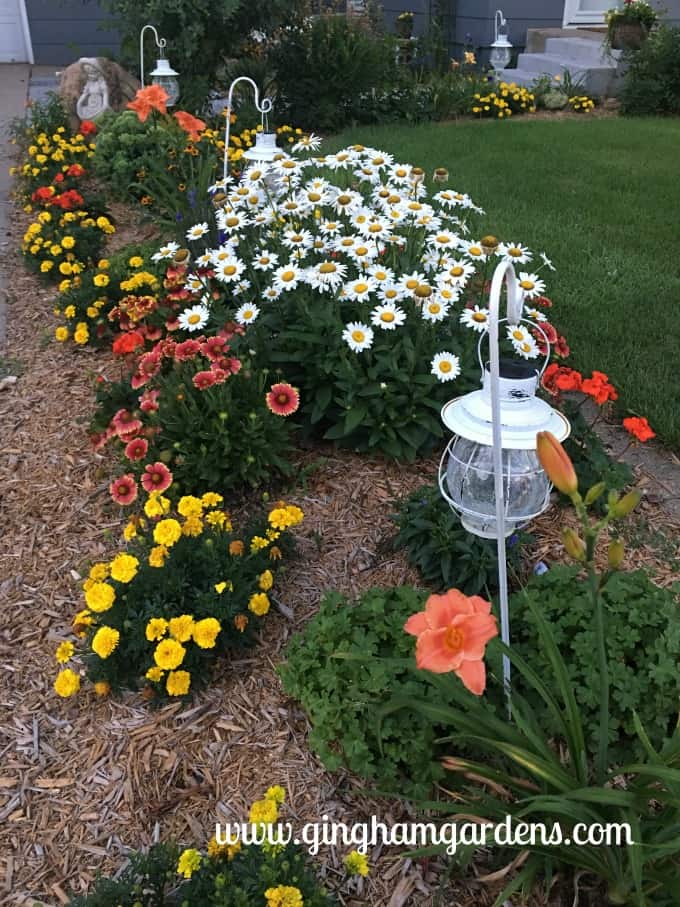
Here are a few pictures taken the first week in July when things were really starting to fill in.
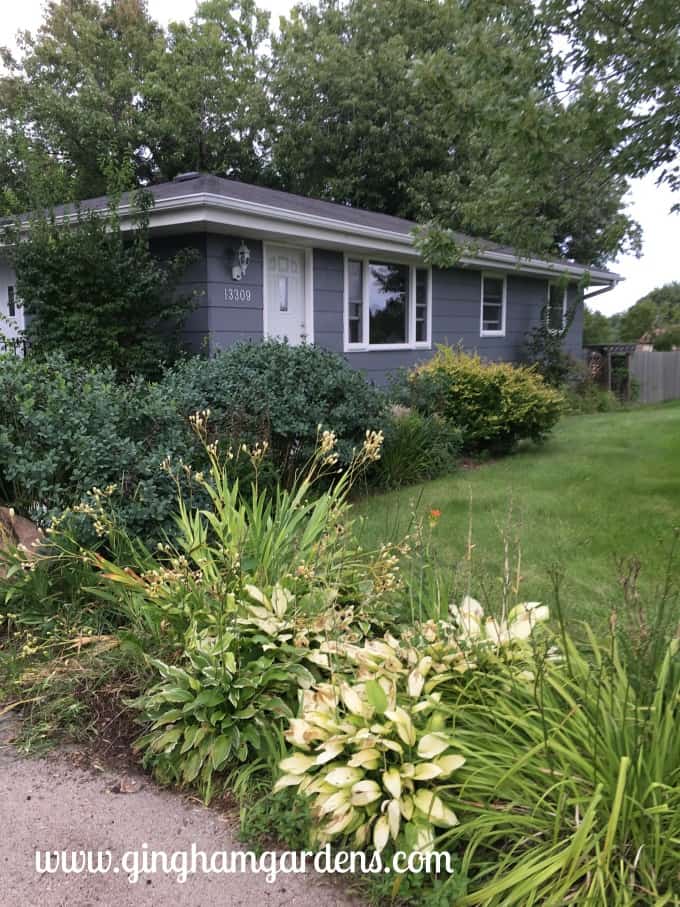
In the next picture, you can also see some of the changes we’ve made so far to the front of the house. My very talented hubby made shutters and a window box. I also spent a lot of time last fall digging out weeds, a crappy, old rose bush and some kind of weed tree that had an unbelievably long tap root. There were actually some decent perennials that I moved to a different area. I then planted some shrubs along the foundation. I’m not completely happy with that area yet. Perhaps I’ll share a garden makeover on it next year, after it’s gone through some more rearranging. Any way, we’ve gotten tons of compliments from our neighbors and we think the changes so far have really made a difference in the curb appeal of our little, humble abode.

Back to the matter at hand… Here are a few pictures of the garden from later in the summer.
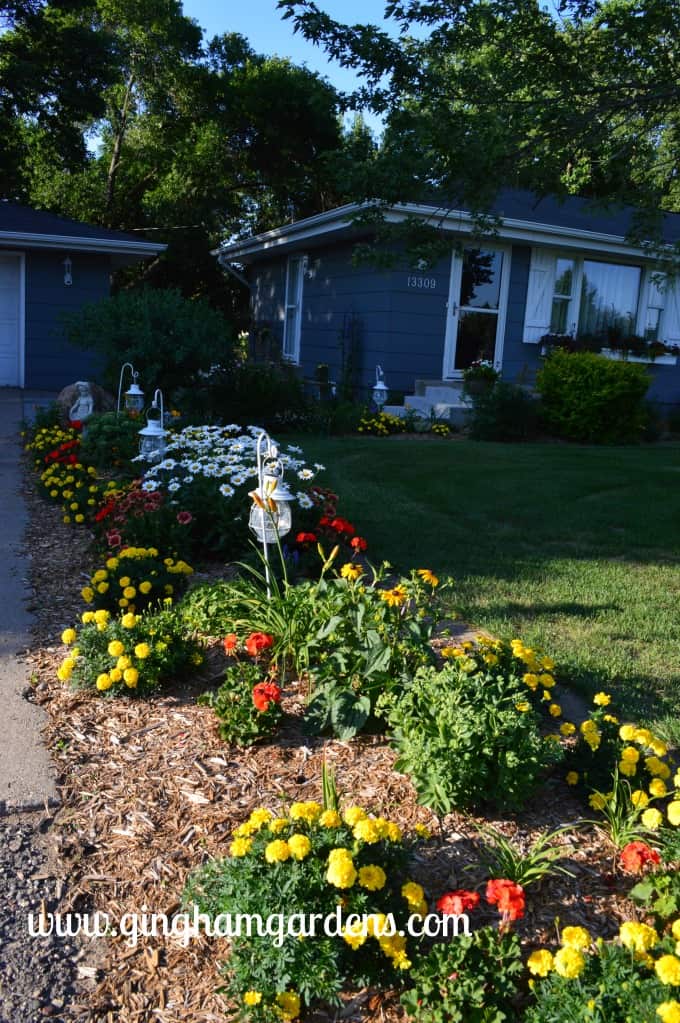
Some of my favorite garden decor pieces are shown in these pictures – this Sweet Little Sophie garden statue. The landscape lights are no longer available, but these are a very close to the same.
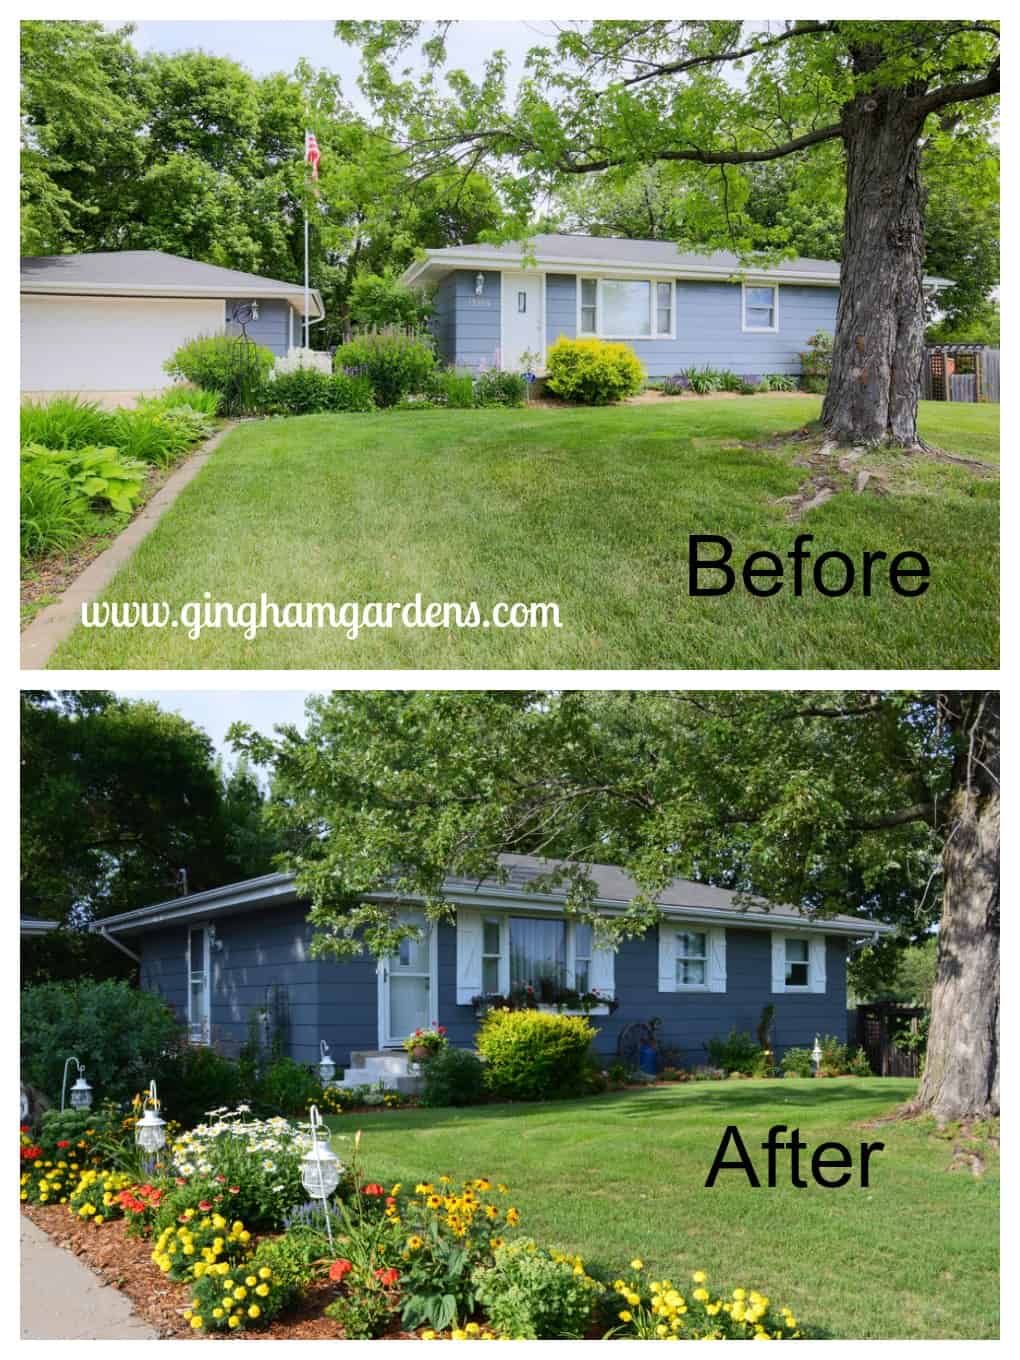
Below is one last comparison, not quite the same angle, but I think it’s easy to see we’ve done a fair amount of work.
More Garden Makeover Projects
Do you love a good garden makeover? Or, need some more inspiration to tackle a garden makeover of your own? You’ll enjoy these posts too:
Flower Garden Makeover – Before and After
Shade Garden Makeover
Small Shade Garden Transformation
From A Weed Pit to A Beautiful Garden
I’m very pleased with the way this garden transformation turned out and I love hearing the compliments from our neighbors. Thanks for stopping by to check out Another Flower Garden Makeover at Gingham Gardens. Hang out for awhile and have a look around. Please feel free to share this post with others. I love comments, too.
Happy gardening,
Julie
p.s. Go ahead and feel free to “pin” these pictures. If you hover in the upper right-hand corner of the picture, you’ll see the little Pinterest icon. Just click it and pin away.
p.p.s I’d love to have you follow me on Pinterest. Lots of great gardening ideas and tons of gardener’s eye candy.
Pins to Share: