How to Overwinter Tender Plants and Bulbs
Now that Fall is here and winter is nipping at our heels (at least at some people’s heels), it’s time to start thinking about ways we can protect our investments! Some of the plants we purchased this summer, can be saved by learning how to overwinter tender plants and bulbs from our gardens. Try these easy tips!
Do you have a favorite plant or flower that you just can’t stand the thought of losing to frost or to winter’s chill? Overwintering plants isn’t for everyone; perhaps you don’t have the space, or you would rather just toss everything and start over again in the spring. I get it, but read on and you might find that one of your favorite flowers from this year’s garden, can be overwintered very easily.
For those of us who practice frugal gardening, or those of us who want bigger plants, or for those of us who are garden geeks and get a charge out of growing things (I’m raising my hand here), overwintering tender plants from our gardens is just plain fun and very gratifying!
This post contains affiliate links. If you click on
one of the links and make a purchase,
I may receive a small commission at no additional cost to you.
See full disclosure here.
For the sake of simplicity in this post, I will refer to bulbs, corms, tubers, etc. all as bulbs.
Why Overwinter Tender Plants and Bulbs
First of all, it’s frugal gardening at its finest! Plus, plants grown from bulbs or tubers just get bigger and better every year.
Also, many varieties of bulbs and tubers will just keep multiplying. And, it’s just plain fun and pretty gratifying (says a garden geek) to be able to grow the same bulbs or plants more than one year, or even several years!
How To Overwinter or Store Tender Bulbs
Those in the warmest of gardening zones don’t have to worry about this, but in the middle and colder gardening zones, most tender bulbs and tubers do not last in the ground during winter. They will rot and decay.
Tender Bulbs That Can be Overwintered:
- Tuberous Begonias
- Dahlia Tubers
- Gladiolus
- Canna Lilies
- Calla Lilies
- Caladium
- Elephant Ears
To remind you How to Overwinter Tender Plants and Bulbs later, here’s a pin you can add to one of your favorite Gardening boards on Pinterest. There are more pins at the bottom of the post. Thanks for Sharing!

Steps for Overwintering Tender Bulbs:
Some gardeners will tell you it’s best to wait until after the first frost to dig up tender bulbs in order to be sure they have gone dormant. Be aware that the weather can be tricky in more northern zones. You should watch the forecast and if the timing isn’t going to work out, dig before frost.
Some plants that are considered tropicals (like caladium and canna lilies) don’t really like being in temperatures lower than 50° F (10° C). Just use your own judgement and watch your local weather forecast.
The Old Farmer’s Almanac Site has a nifty first and last frost date calculator by zipcode. Check it out when you’ve finished up here if you don’t know your expected first frost date!
It is important that bulbs be dry (not shriveled) before packing them away. Digging them up when it’s dry, gives you a head start on this process. If the bulbs are damp when they’re packed away, you run a higher risk of them rotting!
Now, dig up the plant with this great garden fork and shake the dirt off. Lay the bulbs out in the sun for a few hours to dry. The bulbs need to be fairly dry, but not so dry that they shrivel!
After they’ve dried a bit and as much dirt as possible has been rubbed off, cut the foliage down leaving a couple of inches on the top of the bulb.
With some bulbs, especially caladiums, it’s really hard to tell which end is up! So, leaving some of the foliage on the bulbs makes it easier tell “which end is up” when it comes time to replant them in the spring!
Where and How to Store Bulbs for the Winter
There are a few things to consider when deciding where to house your bulbs for winter. Store them some place that stays well above freezing, like around 40° F (4.5° C), but below 60° F (15.5° C). The idea is that bulbs need to go dormant, so they need a dark and cool location!
Pay attention to the humidity level in the room where your bulbs will be stored. If it’s a fairly humid room, toss some silica packets into the container with your bulbs. If it’s a very dry room, you might consider misting your bulbs once every 4 weeks or so. Generally, try to shoot for around 50% humidity, but don’t be stressed if it is above or below: it’s a target to shoot for.
There’s a fine line with moisture – if the bulbs are too moist, they will rot. If they are too dry, they will shrivel up. For instance, dahlia tubers do better if they don’t completely dry out; so store these in a plastic bag.
Honestly, you are going to find that much of gardening is done by “trowel and error!” There are so many ways to do things! You can read articles on the web or in gardening publications of all kinds! I read them too! The tips here are those that have worked in my experience! I don’t think anyone gets a 100% success rate, but what successes you have, will allow you to enjoy your plants in the Spring!
Bulbs can be stored in a cardboard box (shoe boxes work great) filled with sawdust. If you don’t have sawdust, peat moss or shredded paper work too. Or, bulbs can be stored in paper bags by themselves. I also toss several silica packs in the box to help control moisture due to high humidity in the area.
Be sure to mark your box or bag with the names or varieties of your bulbs!
When it’s time to wake your tubers and bulbs up in the spring, here are the instructions for that: How to Jumpstart Summer Blooming Bulbs.
Dahlias are amazing, so if you have any, you definitely want to overwinter them.

If you love dahlias and would like to learn more about Growing Dahlias, stop by and check out the post when you’re done here.
Container Garden Plants That Can Be Overwintered
Go through your container gardens. Do you have sweet potato vine, ivy, vinca vine or creeping jenny?
- Ivy – can be rooted with rooting hormone, or rooted in water.
- Creeping Jenny – although it is a perennial in zone 4 gardens, it will not survive left in containers. Simply go through your containers, dig out the Creeping Jenny, put it in a pot with soil and plant it, POT AND ALLl, in a raised veggie or other bed. Just a warning- Creeping Jenny can be a very aggressive spreader if left in the ground.
- Vinca Vine – simply pull vinca vine out of the flower pots, put it in another pot and bury it all, and then cover it with leaves.
- Sweet Potato Vine – This year I’m going to experiment with sweet potato vine by rooting some in water, rooting some with rooting hormone and by saving the tuber just like I’m saving some of the tubers I mentioned above.
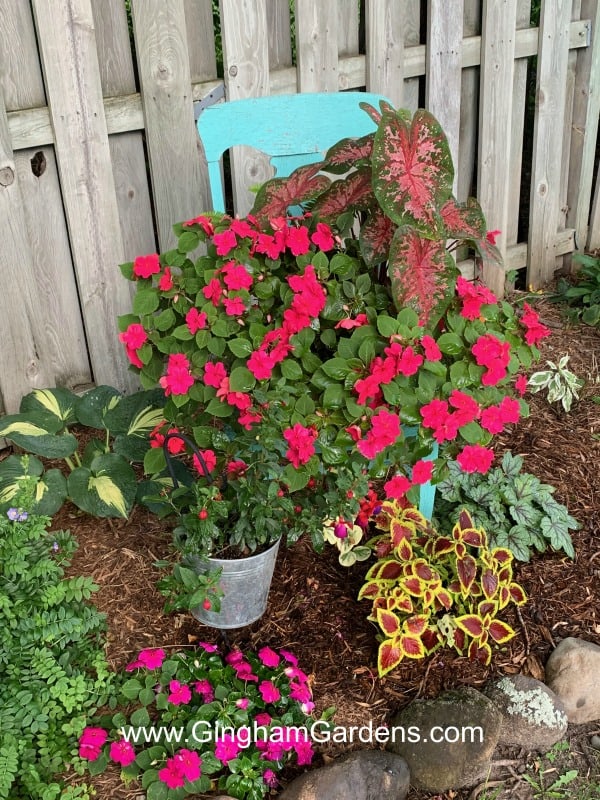
Using the picture of the container below as an example, here are some ways that many of the plants can be saved for the next growing season:
- Overwinter the caladium bulbs.
- Bury the vinca vine using the instructions above.
- There is a fern hiding under the impatiens that can be overwintered indoors.
- Cuttings can be taken from the coleus and rooted in rooting hormone or rooted in water and kept indoors.
- There’s also a fuchsia plant that could be overwintered indoors.
Taking Cuttings From Plants
Plant propagation deserves an entire post all by itself (another thing on my to do list). I’m working on it though and soon we’ll have a post on plant propagation. In the meantime, here are several plants that can be propagated by stem cuttings, along with some very basic instructions.
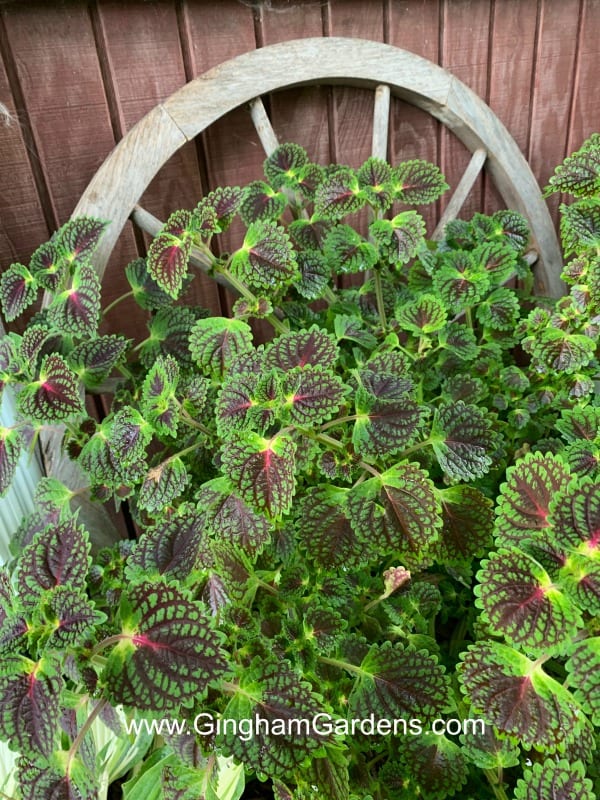
- Coleus – I have some amazing coleus plants this year and I’m taking cuttings from those to overwinter indoors.
- Geraniums – Read the post on Overwintering Zonal Geraniums to see how I overwinter them. Geraniums are also very easy to propagate from cuttings.
- Rosemary – This is another one I will try this year.
- Sedum
- Begonias
- Asters
- Chrysanthemum
- Butterfly bush
- Hydrangea
- Rose
- Salvia
- Dianthus
First, simply cut a section of stem about 3 or 4 inches long at about a 45 degree angle just below a leaf node. Strip the leaves off of the bottom half of your cut stem.
I use the same small containers as I do for seed starting, but any small cups (yogurt cartons work great) with drainage holes in the bottom will work. Add seed starting mix to the cup up to about a half inch from the top.
Next, dip the end of the stem in rooting hormone powder and then simply stick your stems in the soil cups. Gently tamping the soil in around the stems.
The new cuttings can be watered from the bottom by placing the containers in a tray, or you can water them from the top very slowly so as not to dislodge the cuttings.
Place your cuttings in a sunny window, or under a grow light. Next, you just wait. It can take around 6 weeks for the cuttings to grow roots. In the meantime, make sure to keep the soil moist.
After about 8 – 10 weeks, it’s a good idea to transplant your little plants into larger pots and start fertilizing them with weak mix of water soluble fertilizer.
Many plants (sweet potato vine, ivy, coleus, etc.) can also be rooted simply by placing them in water.
If you want more information and pictures on propagating new plants from cuttings, check out this article when you’ve finished up here.
I have several gorgeous Coleus plants this year that I will be taking cuttings from.
More Fall Gardening Goodness
There’s a whole slew of Fall Gardening Posts on Gingham Gardens. Here are a few I think you’ll enjoy:
Tips on Transitioning Container Gardens to Fall
Planting Bulbs in the Fall For Amazing Spring Flowers
All About Seed Collecting
Quick & Easy Steps for Fall Garden Cleanup
Tips for Keeping Potted Mums Looking Great
Fall and Winter are also the perfect times to plan out next year’s gardens! Keep track of this year’s successes and failures: decide which plants need to be relocated: and keep notes on everything by keeping a Gardening Journal. The guess work has been taken out of garden journaling and there are lots of free gardening printables in the Gardening Resources Library! To gain immediate access, simply fill out the form below to become a subscriber to Gingham Gardens.
Part of learning gardening is experimentation and seeing what works for you! If you try something and it doesn’t work, don’t assume you’ve failed! Just keep trying until you find what doesn’t works and finally, what does!
Are you going to try saving some of your favorite garden plants this year? I realize I’m a gardening geek, but it’s just so gratifying to see tender bulbs and plants that you’ve overwintered or propagated growing in your garden! I encourage you to give it a try this year to see what works for you! There may be some plants that don’t make it, but each success will give you more confidence!
Thanks a bunch for stopping by Gingham Gardens today! I hope you enjoyed learning How to Overwinter Tender Bulbs and Plants from your garden. If you have a question about this tutorial, or another gardening question, or you just want to say “hi,” please leave a comment and I will get back to you as soon as I can. I love hearing from you!
Happy Gardening,
Julie
More Great Things on Gingham Gardens
Sign up to receive our weekly newsletters full of gardening tips. You’ll also get access to our Gardening Resources Library and all our helpful gardening printables.
More places to find Gingham Gardens:
- Visit Gingham Gardens on Pinterest.
- If you’re on Facebook, Gingham Gardens is also on Facebook.
- Love all things gardening? Check out our shop!
Save a pin to your gardening board on Pinterest, so you can remember this post later: