Tips For Growing Daylilies (Every Flower Garden Needs Them)
Daylilies are one fantastic plant! They’re beautiful, and one of the easiest, low maintenance perennials to grow. They’re tough, too and if you ignore them, they’ll be fine. However, you’ll be rewarded with outstanding blooms and the best results, if you give them lots of love, including good growing conditions! If you’re ready to get the dirt on daylilies, let’s get started with some great “Tips for Growing Daylilies!”
A Little Education About Daylilies (Botanical Name – Hemerocallis)
We are NOT talking about hemerocallis vulva (a.k.a. orange ditch lilies) here. Sometimes, when gardeners hear “daylilies” they immediately tune out because they’re thinking all daylilies are invasive and “ugly” like the common orange ditch lily. Personally, I like “ditch lilies” because my mother -in-law had a bed of them behind her house: that’s what was available. However, I realize that many people dislike them intensely. From a daylily collector’s perspective, all daylilies are NOT the same. There are so many wonderful varieties of daylilies with beautiful flowers, that it’s easy to get addicted! I love daylilies!
Daylilies are NOT grown from bulbs and are not related to true lilies (lilium) that are grown from bulbs. The roots of a daylily plant are fibrous, clumping, fleshy masses that store water.
Each individual flower on a daylily plant blooms for just a day, thus the name daylily.
This post contains affiliate links. If you click on
one of the links and make a purchase,
I may receive a small commission at no additional cost to you.
See full disclosure here.
Reblooming Daylilies
Out of curiosity, I did a little research, and saw that as of 2024, there are over 100,000 registered cultivars of daylilies. A “cultivar” is a plant that has been bred by humans in order to get the traits the breeder wants to “cultivate” in the plant, such as fragrance, flower size, height or the ability to rebloom. Daylilies that rebloom are highly desirable! You can have a longer season of bloom with “rebloomers!” A reblooming daylily starts first with a big wave of flowers. When those flowers are finished, it will take a rest and then send up more blooms a few weeks later! To be fair, not all varieties designated as rebloomers, will do so in northern gardens. But, many rebloomers will flower constantly.
I love looking through garden catalogues and websites that feature daylilies. Any of the “returns” series fall into that constant bloomer category. Happy Returns is probably the most popular in this category. There’s also Rosy Returns, Red Hot Returns, Fragrant Returns, When My Sweetheart Returns, Passionate Returns, Stephanie Returns, etc., etc. This sweet little Passionate Returns is one of my favorites. Just look at that color! Stella d’ Oro, a golden yellow daylily, is a very popular reblooming daylily.
Tips for Growing Daylilies – Where to Plant
Daylilies are hardy in zones 4-9. They can grow in poor soil, but grow best in soil that is fertile and well-drained. Daylilies do best in full sun (6 or more hours of sun), but will also be okay with some relief from afternoon sun (partial sun or partial shade, 4-6 hrs of sun) in areas that get very hot. Remember, daylilies (and most other perennials) can be moved to a different location in your gardens if they aren’t doing well in the area in which you have them planted.
Tips for Growing Daylilies – How to Divide and Plant Daylilies
Daylilies will grow just fine for many years without being divided. After about 4 or 5 years when the plants are getting quite large, you may want to consider dividing your daylily. Sometimes if the plants get too overgrown, they will bloom less.
The best time to of year to divide daylilies is in early spring when they are first emerging from the ground, or in late summer /early fall after their bloom cycle is complete. The best way to divide daylilies is to dig up the entire clump. I love this garden fork for digging them up. The clumps get less damaged when you use the garden fork, instead of a shovel. Then, cut through the crown of the plant with a sharp knife, or pull the clump apart into manageable pieces. Before replanting, cut the foliage back to a height of 5″ or 6″. Now, you have new plants to share or to replant in your gardens! If you need additional help dividing and transplanting your daylilies, check out Tips for Transplanting Perennials.

Tips for Growing Daylilies – How to Plant
Whether you are planting or replanting a division of a daylily, the directions are the same.
- Dig a hole a little deeper than the root mass of the daylily.
- Next, mound up soil in the middle of the hole.
- Spread the daylily roots over the mound (see the image above) and fill in the hole surrounding the roots with the soil you dug out. It’s a good idea to add organic matter, such as compost, at this point. You can add slow release fertilizer too, if you so desire.
- The crown of the plant needs to be just below the surface of the soil or ground level and not buried too deeply.
- Water your transplant well so it starts developing a strong root system. For the first year, give your new daylily special care and it will reward you with many beautiful flowers in the years to come.
- You should begin to see new growth within a week or so.
Tips for Growing Daylilies – Care & Maintenance
Watering & Mulching Daylilies
During their first growing season, daylilies should be watered during dry weather and for several weeks after they are planted. This will help them get established more quickly. Rather than watering every day, water twice a week if it doesn’t rain. Water deeply, making sure the water soaks down into the root zone. Mulching around daylilies will help keep the soil moist and also help to control weeds.
Daylily Care – Deadheading
As mentioned earlier, each daylily flower lasts just one day.! To keep the plants looking their best, snap off the spent flowers being careful not to disturb nearby flower buds. The easiest way to deadhead is by using garden shears or bypass pruners.
Below, in the before and after picture of a Fairy Tale Pink Daylily, you can see the difference between seed pods and new buds. Unless you have the patience to start daylilies from seed, you will also want to clip any seed pods. By clipping both the spent flowers as well as the seed pods, the daylily will put it’s energy into making new flowers, not putting it’s energy into seed production. Once all the buds have bloomed, the flower stalks can be cut down to the base of the plant.

As you are deadheading, go ahead and remove any dead foliage or discolored leaves. Just a side note here about the foliage of daylilies: some daylily varieties are more prone to yellowing or browning foliage that others. I’ve noticed in my gardens that if we have an exceptionally hot and dry summer, some of my daylilies foliage looks awful and some are fine. I haven’t been able to find an explanation for this other than it’s just the nature of some varieties. If you have a daylily with dying foliage, just clip the foliage as much as you need to. It will not hurt the plant.
Fertilizing Daylilies
It isn’t necessary to fertilize daylilies if you have great soil! If the soil hasn’t been amended with compost, you can use a slow release fertilizer such as Osmocote around the base of the plant. Just sprinkle it around the base and work it into the soil a bit, before applying a fresh layer of mulch. Adding this fertilizer has made a huge difference in my daylilies and the number of blooms on each plant.
There are many daylily groups on Facebook and I’ve seen the daylily pros recommend using Milorganite around their daylilies. I will definitely be trying that this year.
How to Extend the Blooming Season, or Get Your Daylilies to Bloom Longer
As a recap of the above information, to get the most blooms from your daylilies, or to get your daylilies to bloom longer:
- Be sure your daylily plants get enough water. If you haven’t had enough rain, water your daylilies.
- Fertilize your daylilies with a slow release fertilizer in the spring.
- Deadhead your daylilies.
- Look for reblooming varieties of daylilies.
- Plant a variety of daylilies that are early bloomers, mid-season bloomers and late season bloomers. Buying a variety of plants with different bloom times will ensure that you have daylilies blooming late spring through late summer.
What if my Daylilies Don’t Bloom
Sometimes folks ask, “How Do I Make my Daylilies Bloom?” Let’s do a little troubleshooting. Go through this list and see if you can pinpoint the problem and then take steps to remedy it.
- Is your daylily getting enough sun? Daylilies love sun! Do you need to relocate your daylily to a sunnier spot in your garden?
- Is your daylily getting too large? Generally daylilies don’t have to be divided for about 4-5 years, but if they get too big, their blooms will diminish. Go back up and read the section on dividing your daylily.
- What is your soil like? Daylilies aren’t too picky, but they do like to be fertilized. If your daylily isn’t crowded and is getting plenty of sun, give it a boost with fertilizer.
Daylily Care After Blooming
Another common question: “What should I do with my daylilies after they have finished blooming?” First of all, be sure all the spent blooms and seed pods have been removed from the plant (see deadheading above). Once the scapes (the long, hard stems) no longer have any new buds left, they can be cut back to the base of the plant to keep the plants looking tidy. Like we said above, many daylily varieties are reblooming varieties and after taking a little break, the plants will rebloom. You have your best chance of rebloom if the daylily plant is well cared for. At this point, you can give the daylilies another scoop of Osmocote, or Milorganite.
Tips for Growing Daylilies – Buying Online
I’ll buy daylilies from any garden center or any place they catch my eye, but my favorite place to purchase daylilies is online. If you really want to add some different varieties to your collection, shop online. Some of my favorite online daylily sellers are Oakes Daylilies and Smokey’s Gardens. I’ve had awesome results and received great customer service from both companies. If you have a favorite online daylily source, please leave a comment below and let us know.

A few things to remember when ordering online. Daylilies are usually sold by fans and they are shipped as bare root daylilies with only 3 or 4 inches of leaves and stem. They come with planting and growing instructions, and I would recommend following those instructions.

Daylily Collections
Are you a collector of daylilies like me? In order to keep track of all the daylilies I have, I created a Plant Inventory sheet that I keep in my Garden Journal. If you’re interested in getting a copy, I’ve included it in my library of Free Gardening Printables.
This photo of Inherited Wealth was taken in the evening just as the sun was shining it’s last few rays.
The variety below is Lavender Rainbow. Isn’t it gorgeous?

Here’s a Pin to save to one of your Gardening Boards on Pinterest for future reference.
There are additional Pins at the bottom of the post. Thanks for pinning!
Heavenly Angel Ice is a new addition this year and my first ever spider daylily.


Like most other perennials, it takes daylilies a year or two to get established and take off, but once they do, they’ll bloom reliably for many years and just keep getting bigger and better with each passing year. That’s it for the Tips for Growing Daylilies, but I do have some more pretties I’d like to share with you.
Growing Daylilies in Pots
Do you grow daylilies in planters? Every summer I go overboard purchasing new daylilies that I don’t already have even before I know where I will put them in the ground. The best thing to do when this happens is to plant your daylilies in containers! For something completely differently, it’s also fun to plant daylilies in pots with annual flowers!
By the way, if you live in a colder gardening zone and have daylilies in containers, bury the container or else, remove the plant from the container and plant it in the ground before winter sets in.
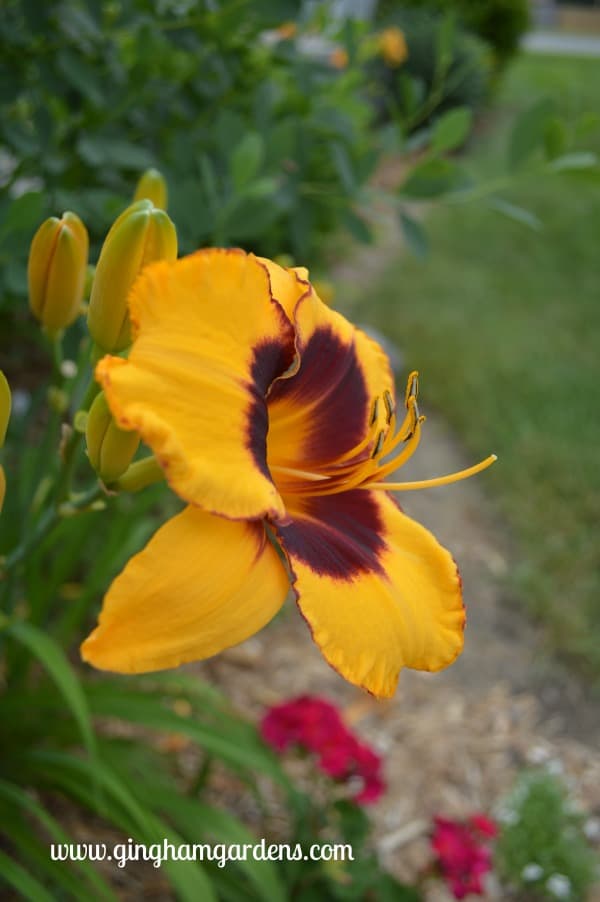
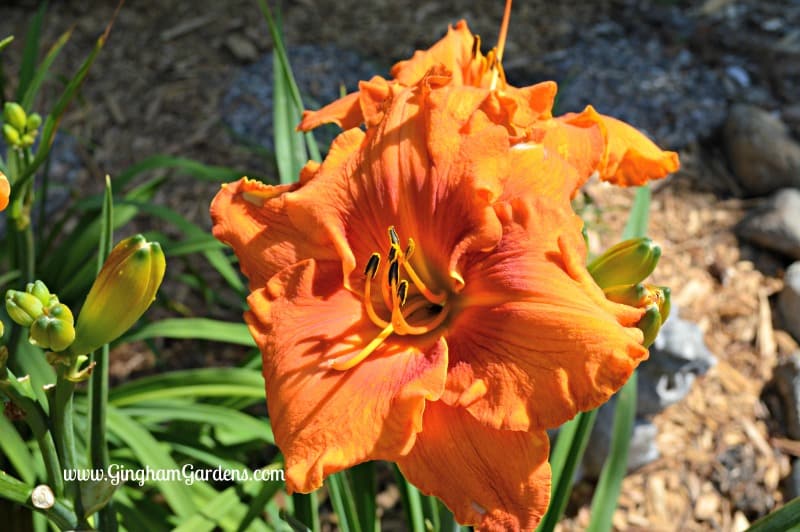
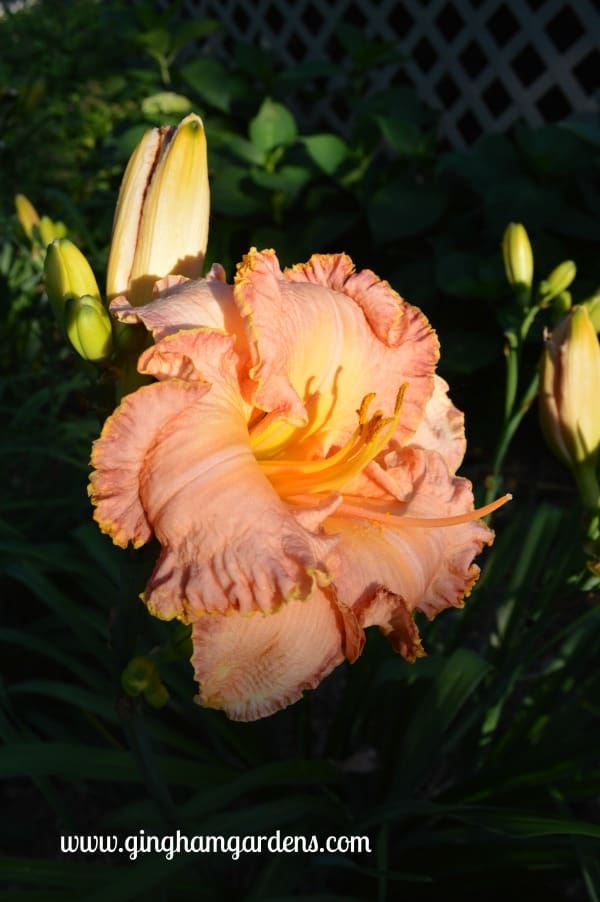
Daylily Eye Candy (a/k/a Daylily Photo Gallery)
In the daylily images below, the name of the daylily is in the caption below the picture.


Daylily Fall Care
Again, daylilies are not too picky. If you have the time and desire, you can cut daylilies to the ground in the fall. In colder zones, it’s okay to go ahead and mulch them. If you don’t have time in the fall, you can do nothing. Daylilies are very hardy and can survive the worst of winters. Fall is also a great time to divide and transplant daylilies.
More garden inspiration, here are some other posts you’ll enjoy:
Classic Perennials (That Every Flower Garden Needs)
Small Shade Garden Transformation
Garden Decor (Lots of Creative Ideas for Your Garden)
Are Deer Chomping off your Daylily buds?
Dealing with Garden Pests
Having problems in your gardens, here are a few posts that will help:
Flower Garden Maintenance Tips
How to Deal With Weeds In Your Garden
Thanks a bunch for stopping by Gingham Gardens today. I hope you’ve enjoyed “Tips for Growing Daylilies,” along with some beautiful Daylily Eye Candy.
The American Hemerocallis Society has a wealth of information on their website. If you’d like to learn more about daylilies, pay them a visit when you’ve finished up here.
Do you have daylilies in your gardens? What are your favorites? Please leave a comment and let me know, or feel free to email a picture.
Happy gardening,
Julie
p.s. Follow Gingham Gardens on Pinterest for lots of great gardening ideas and tons of gardener’s eye candy.
p.p.s. You can pin these pictures by hovering in the upper left-hand corner. Pin away! There’s a big pin at the bottom of the page too. Thanks a bunch!
Pins to Save to Pinterest: