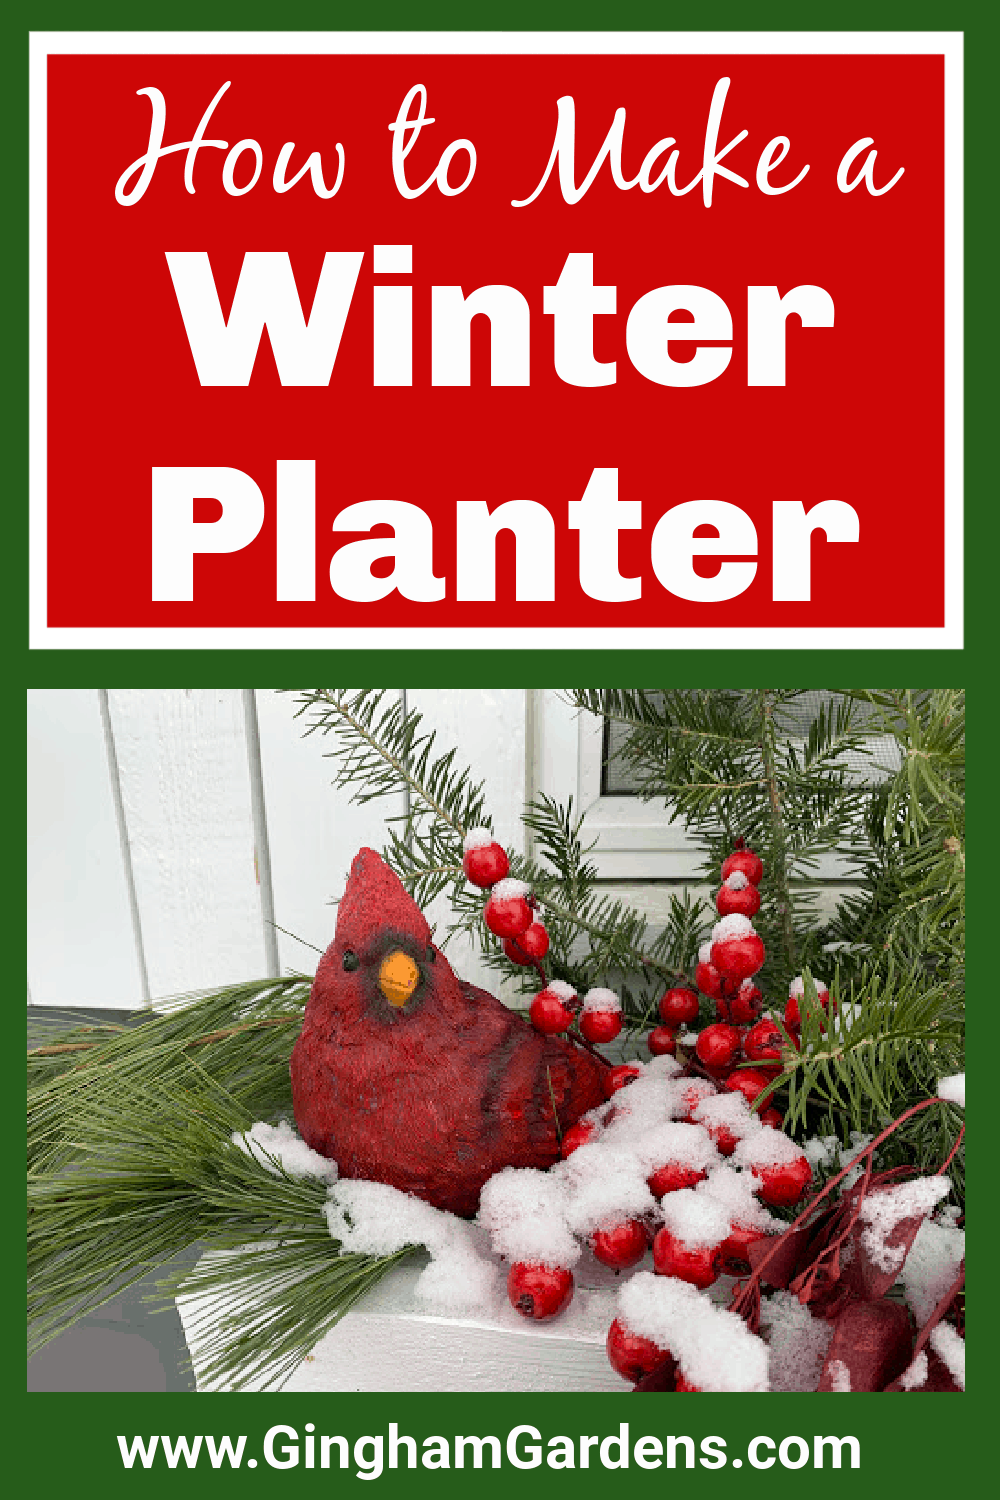
How to Make a Winter Planter
Have you ever looked at the beautiful winter outdoor planters featuring spruce tips and other lovely greenery and said “yes, please”, just to look at the price tag and say, “no, thank you.” I just can’t justify spending those prices and yet I love adding festive touches for the holidays and having something pretty to look at outdoors besides winter gloom. I have no floral arranging skills whatsoever, but if I can put together a winter planter, so can you. Every year I do it, my winter container garden on my front porch looks better and better. We’ve included some practical, easy-to-follow steps for creating your own DIY Winter Planter.

This post contains affiliate links. If you click on
one of the links and make a purchase,
I may receive a small commission at no additional cost to you.
See full disclosure here.
The Best Plants, Evergreen Foliage and Other Things to Include in Your Winter Planters
- Spruce Tips
- Branches from other evergreen plants – use a variety of color variations. For instance, blue spruce adds such an interesting color contrast to the other greens.
- Hydrangeas
- Red twig dogwood branches
- Winterberry holly
- Twig Balls
- Birch or Aspen logs
- Magnolia leaves
- Grass Plumes
- Lotus Pods or other dried seed pods from your garden
- Berries (If you don’t have real ones, be sure to buy the ones intended for use outdoors.)
- Pine cones
- Holly
- Curly Willow Branches
- Eucalyptus
- Solar Lanterns
- Christmas Balls
- A Big Outdoor Bow

Feel free to pin any of these pictures to your favorite gardening or outdoor winter decor board on Pinterest. There are more Pins at the bottom of the page.
How to Make an Inexpensive Winter Planter
Purchasing all your supplies is definitely cheaper (unless you go crazy) than buying a planter already put together. But, do you know what is cheaper yet? Foraging in your own yard, your neighbor’s yard or family members’ yards for these supplies. Of course, ask for permission if it’s not your property, and be responsible. Like, don’t go loping off the tops of baby trees. Simply do a little pruning off of lower branches.
Scroll back up and go through the supply list again and see how many of these things you can find in your yard or in your neighbor’s yard. I think you’ll be surprised at how much you can come up with for free.
If you’re having trouble coming up with something that doesn’t look dead, use spray paint. Really! Hydrangeas take spray paint really well. You can also use dark red spray paint on tree branches to make them look like red dogwood branches.
If you’re very nice, it’s possible to get free tree trimmings from places like Home Depot and Lowe’s. Or, even stop by a local pop-up Christmas tree selling stand and simply ask if they have tree trimmings you can have. Another good idea is to buy the cheapest, ugliest tree on the lot and cut it up for your winter containers and other outdoor decorations.
Although I’ve never done it, I’ve read on several gardening Facebook groups where members have gone to their local compost site and were able to get evergreen trimmings for free.
Another frugal way to do outdoor winter planters is to save some of the elements you use from year-to-year, like:
- white birch branches or any other wood branches you use
- dogwood twigs
- pinecones
- lotus pods
- anything else that will keep
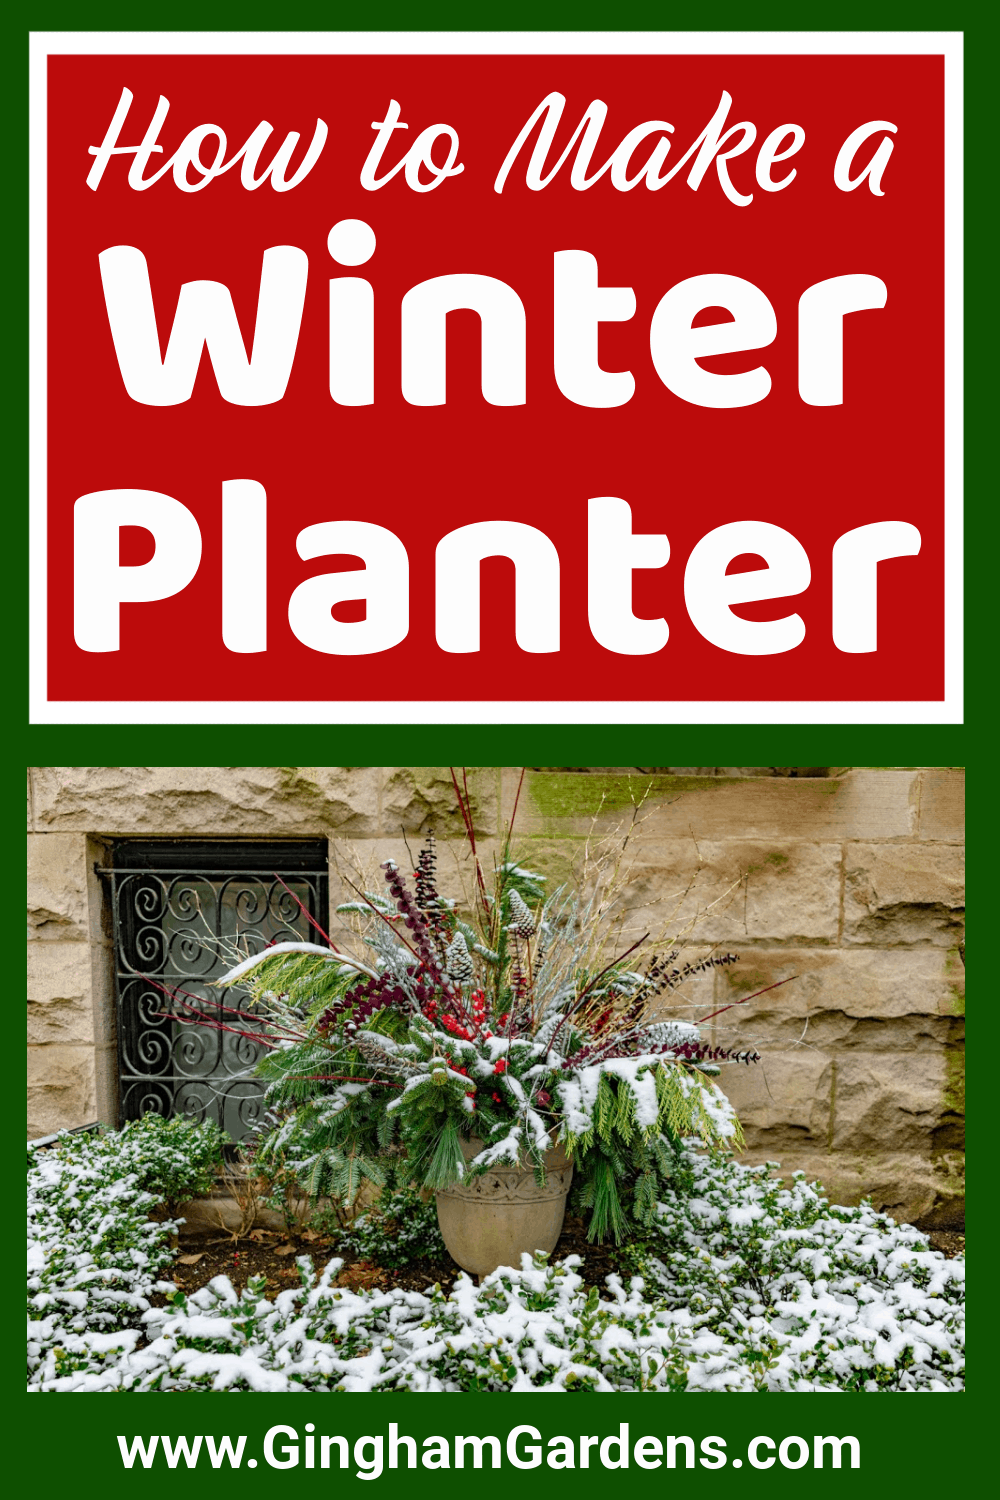
With a little creativity and work, you can create beautiful winter planters very inexpensively. Below is a picture of a winter container Gingham Gardens’ reader, Susan from Colorado, put together using mostly branches and greens she found in her yard and woods.

Creative Pots to Use for Winter Containers
I just use the containers I have in my collection. Just beware that if you use ceramic or clay pots and you live in a zone where it freezes, they will likely freeze and crack. Any large planter with drainage holes will work. Here are some ideas for creative planters:
- Galvanized items like buckets, watering cans or wash tubs
- Vintage milk cans
- Urns are great if you’re looking for some elegance
- Wine Barrels
- Bushel Basket
- Etc., Etc. – use your imagination
Winter Porch Pots – How to Make Simple Arrangements
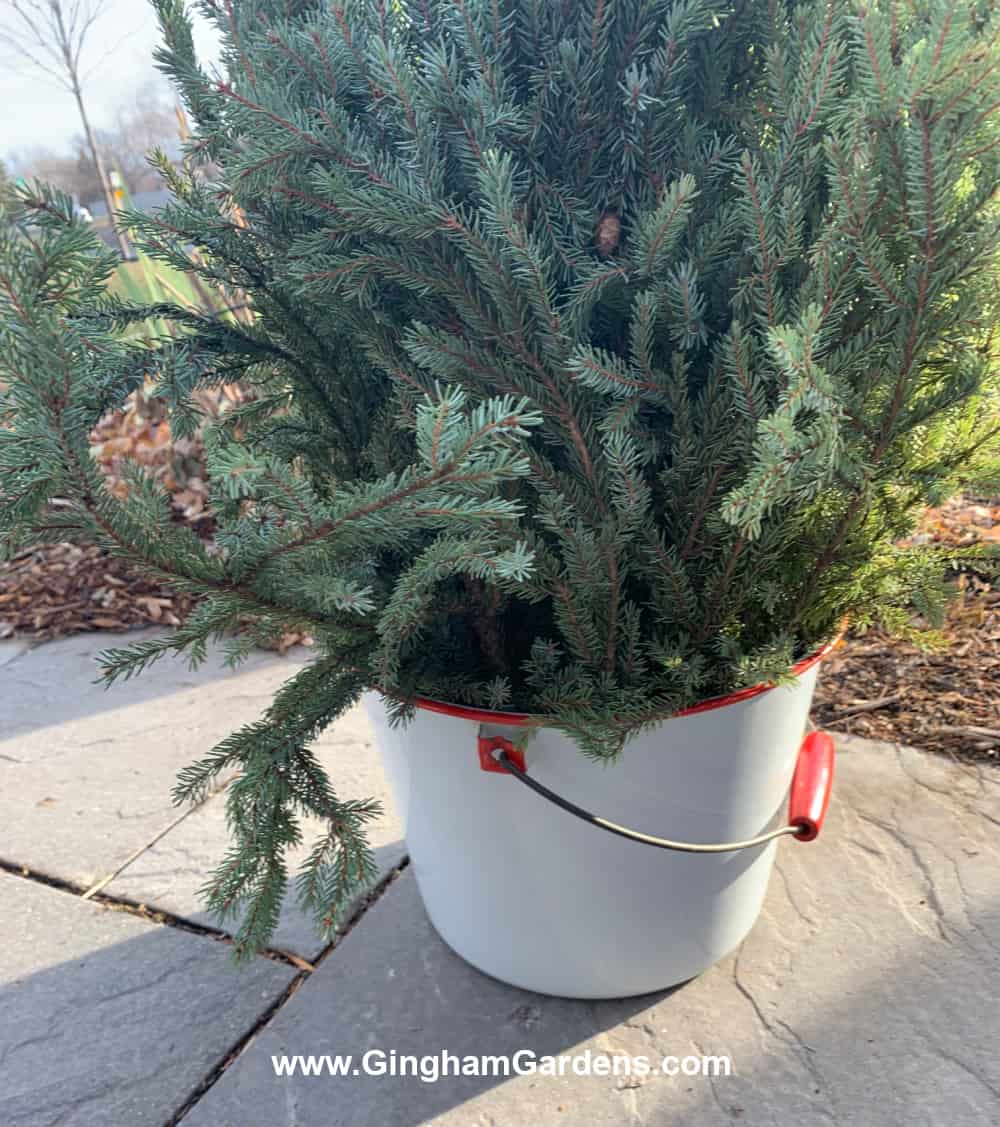
First, if you purchase your spruce tops, evergreen boughs or other greenery, clip off the ends of the stems. Giving the branches a clean cut will cause the evergreen stems to absorb water, which will help them last longer.
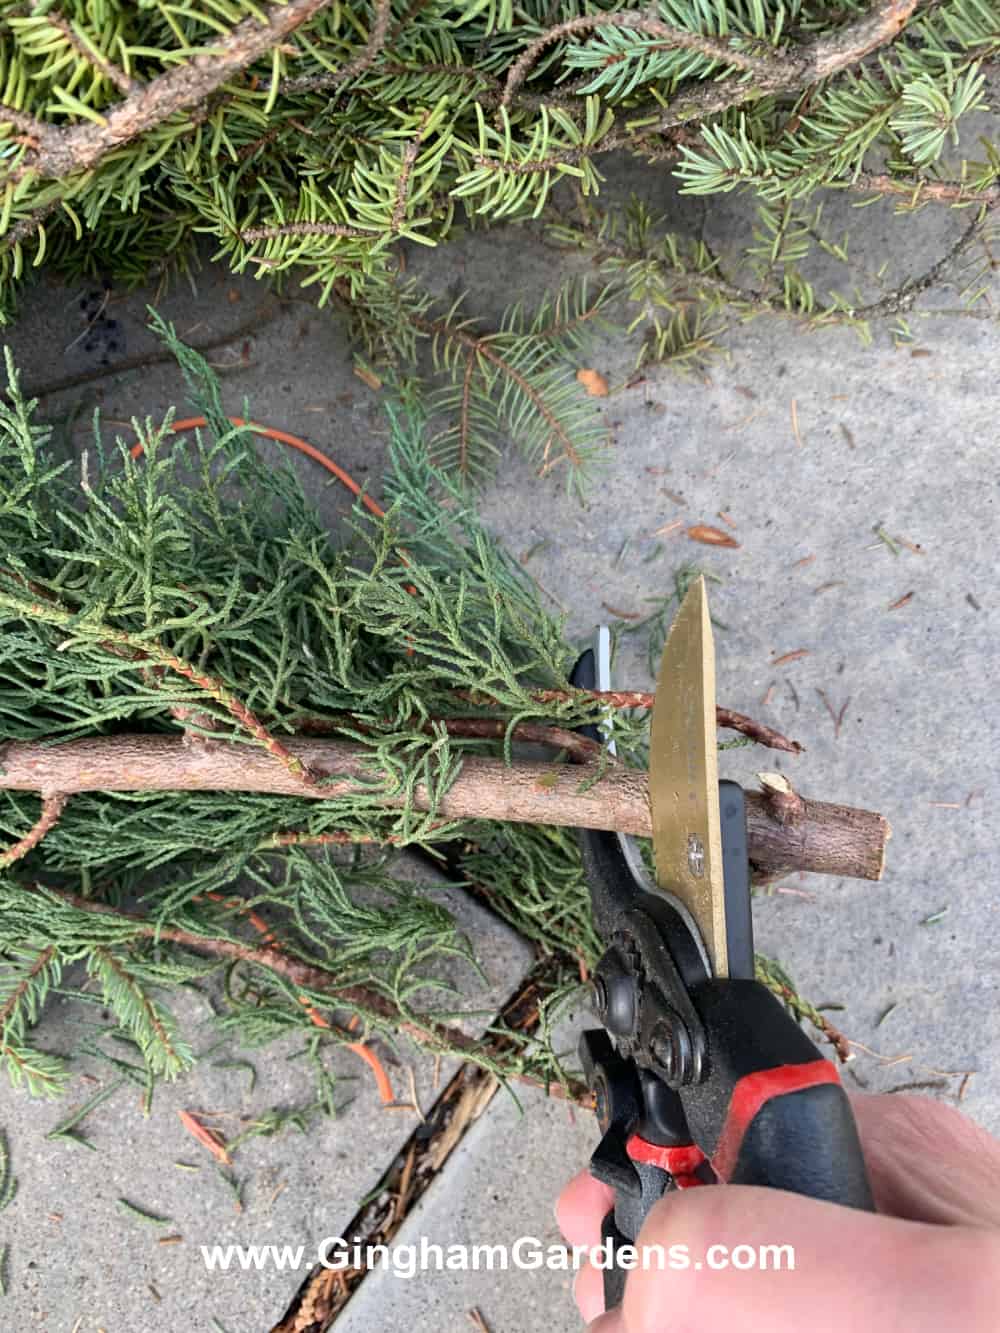
Place the fresh clipped greens into a bucket with water to absorb water. Again, the more water they absorb, the longer they will last.
Next, fill your pot with soil, or just use one of your fall containers that already has soil in it (so long dead mums). If possible, arrange your winter containers before a freeze. As an alternative to potting soil, use rice hulls or sand. The idea here is to use something that you can stick your branches, sticks and logs into. The benefit of using potting soil is that it will freeze and keep your planters intact through winter.
If you can’t come up with soil, floral foam works great. You can even use it on top of the soil. If you live in a warmer zone where it’s not going to freeze, I would recommend using floral foam bricks because they hold moisture. I ended up using a combination of potting soil and the foam bricks here because all my fall containers were frozen solid. Chicken wire formed into a ball will also work.

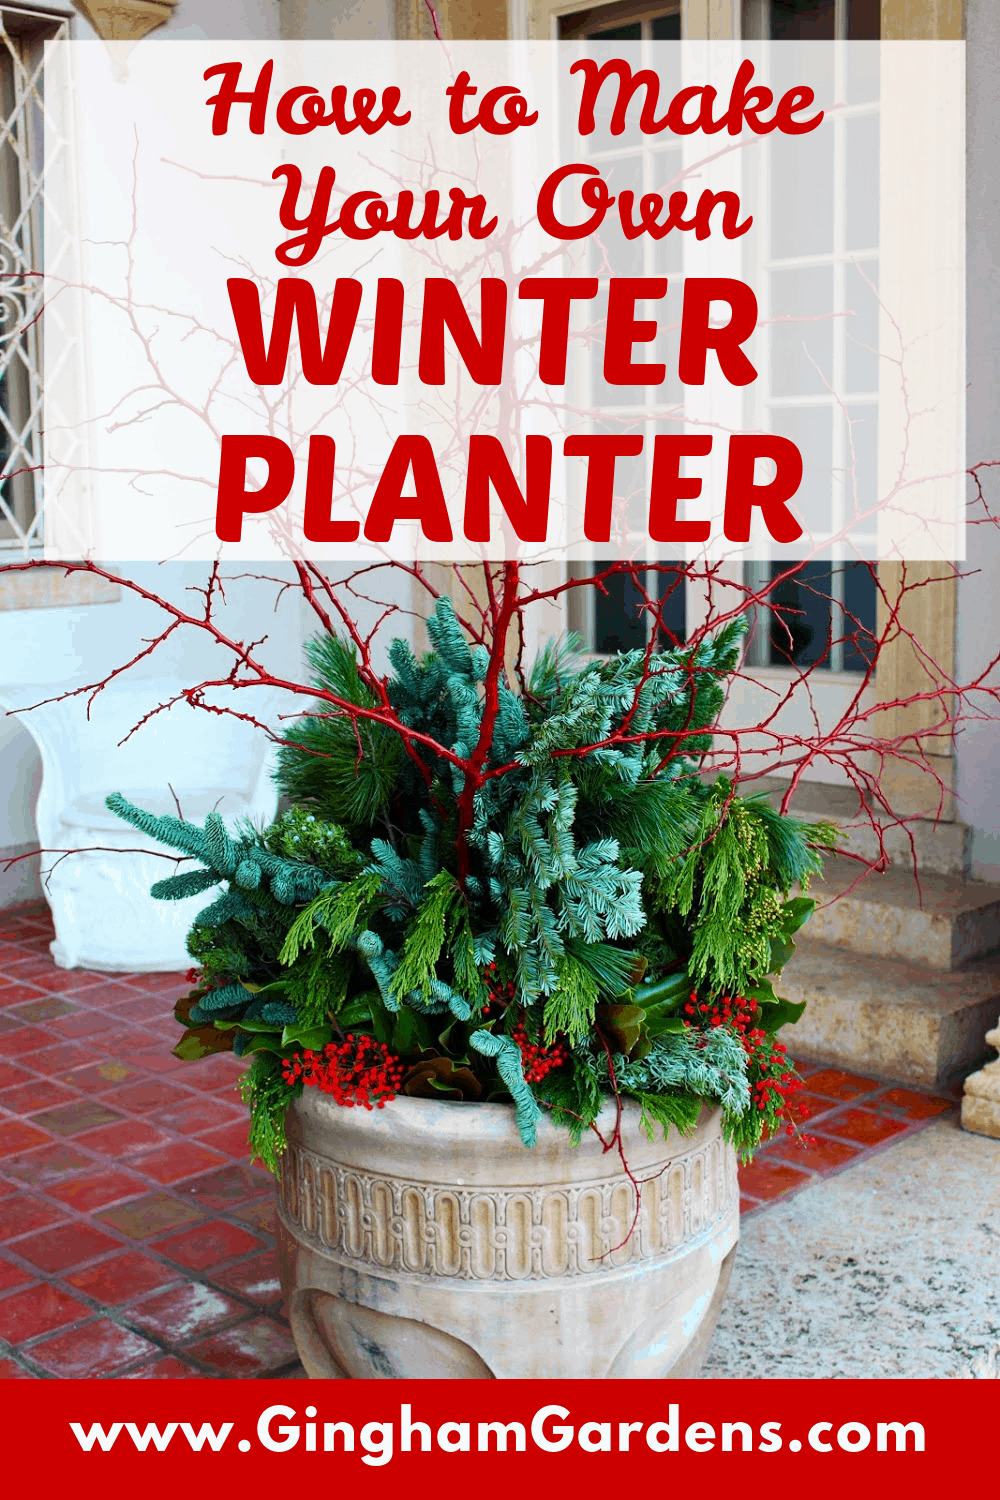
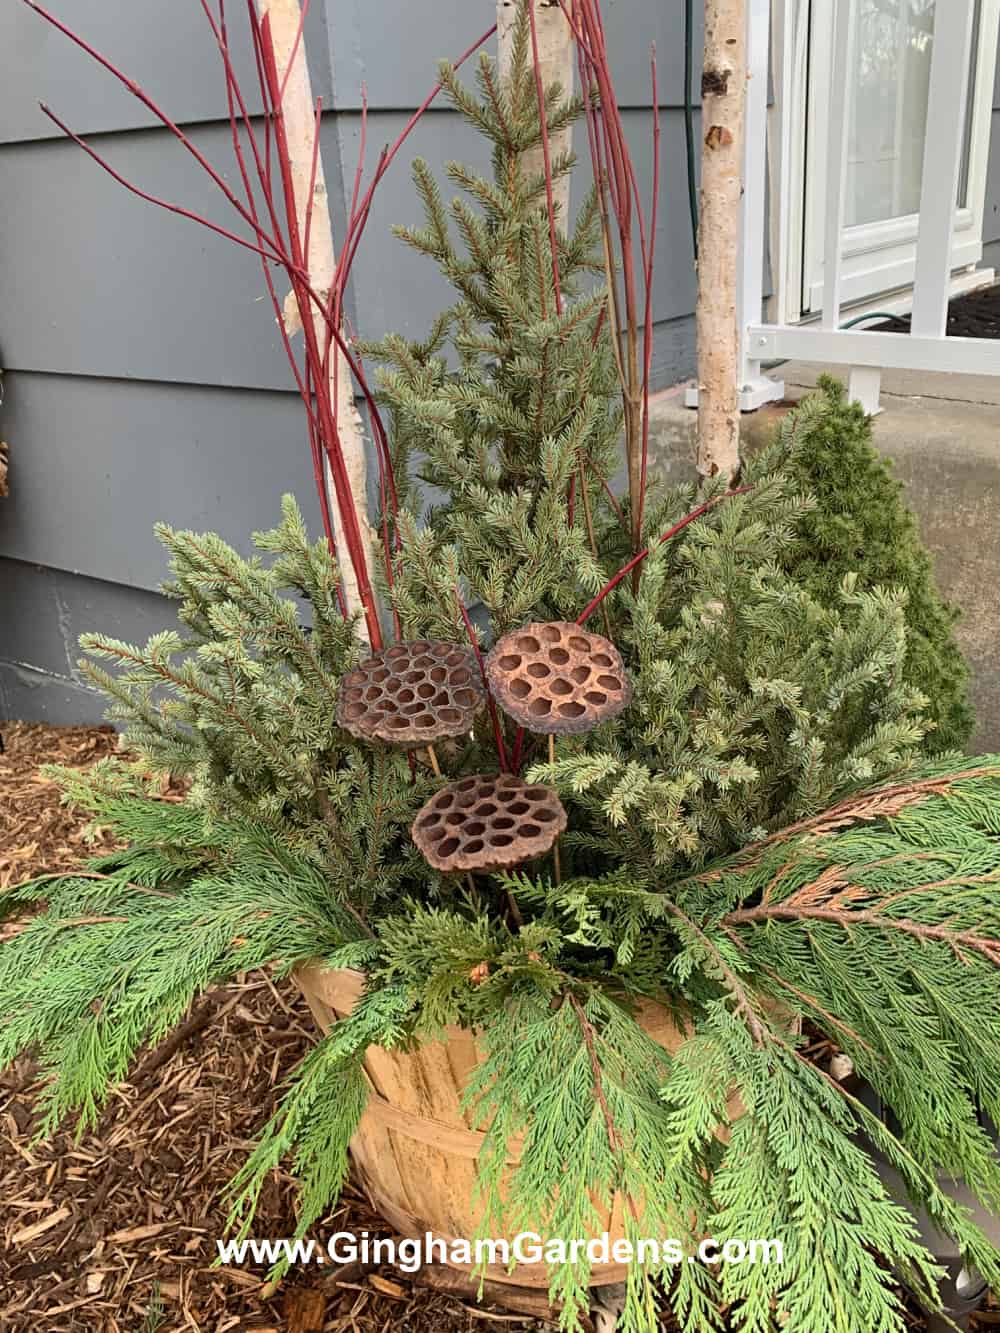
Now, place the tallest evergreen branches or logs in the middle of the planter, and then arrange the remainder of the greenery around those centerpieces. Here I use birch logs. I would prefer them to be different heights, but my handyman wasn’t around to cut them for me.

There really is no method to my madness, I just keep at it until I create a winter container that will pass muster. I don’t believe there is a right way or a wrong way to create winter planters. For instance, on the video I share below, the florist starts by arranging the greens first and then adds the tall focal points last. In a winter porch pot arranging class that I took, the floral arranger started with spruce tips first.
The best advice I can give here is to experiment until you come up with a winter planter you love. With each container that you make, your skills will improve and you’ll find the method that works best for you.

It’s easy to see from taking pictures along the way what you did wrong and what you can change next year. For example in this planter, I should have staggered the greenery a little better and made it fuller. With that in mind, layer your greenery so that it’s not all one height.
Once you have all the greenery arranged, water the soil or whatever you planted in very well. As an added step spray your evergreens with Wilt Stop or Wilt Pruf. If you want a planter that lasts, don’t skip this step.
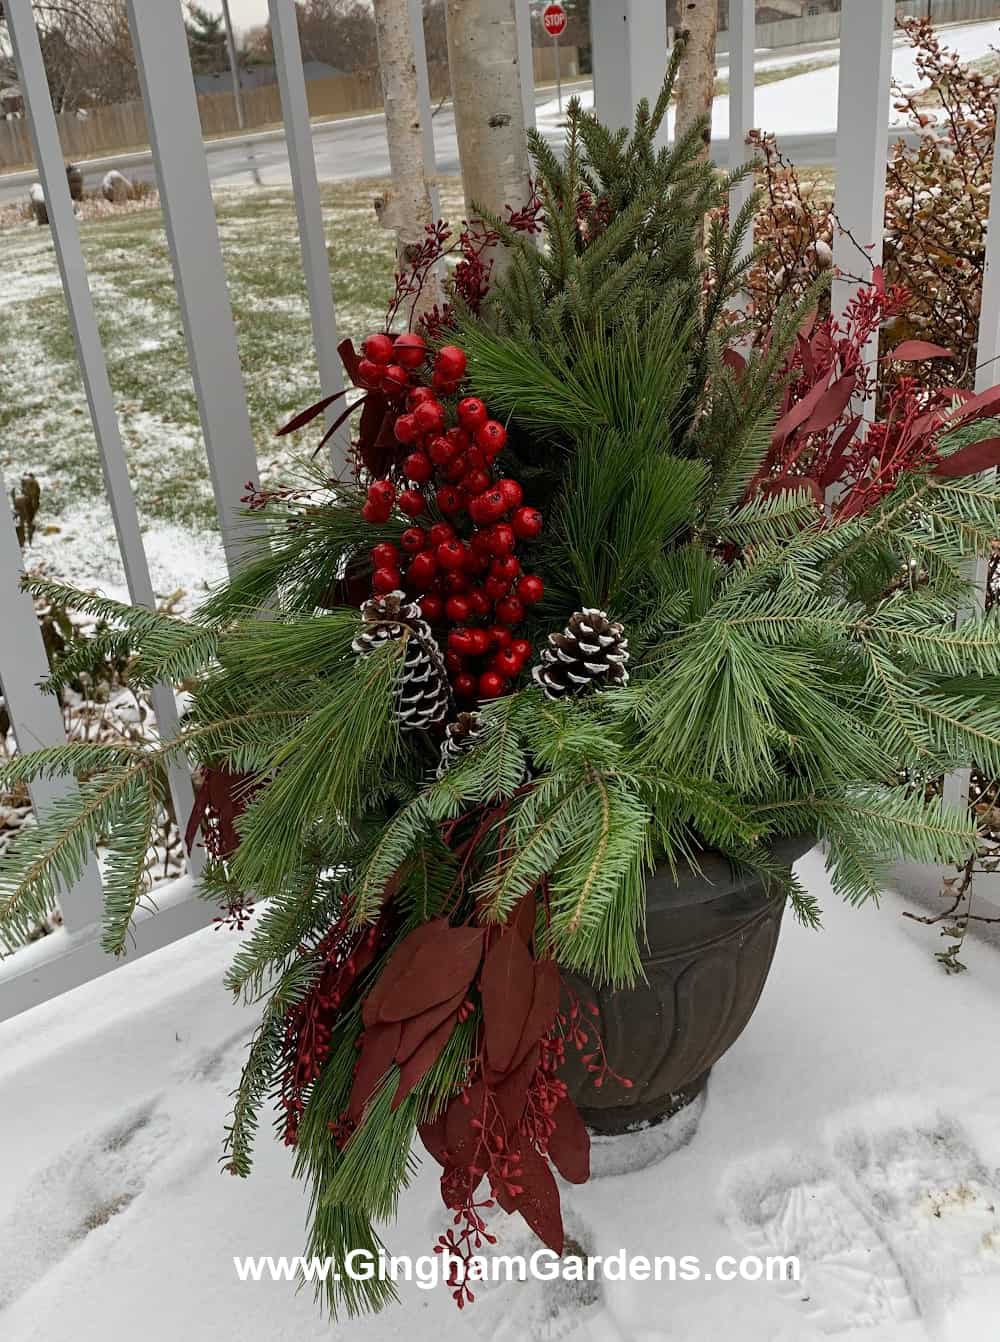
Add in some extras like pine cones, berries or even a solar lantern. To create outdoor Christmas planters add an outdoor bow and some bright Christmas balls. You can always remove the Christmas-looking items later in the winter.
Below is a sample of a winter planter using just natural elements. I think the bushel basket adds a rustic touch to the arrangement.
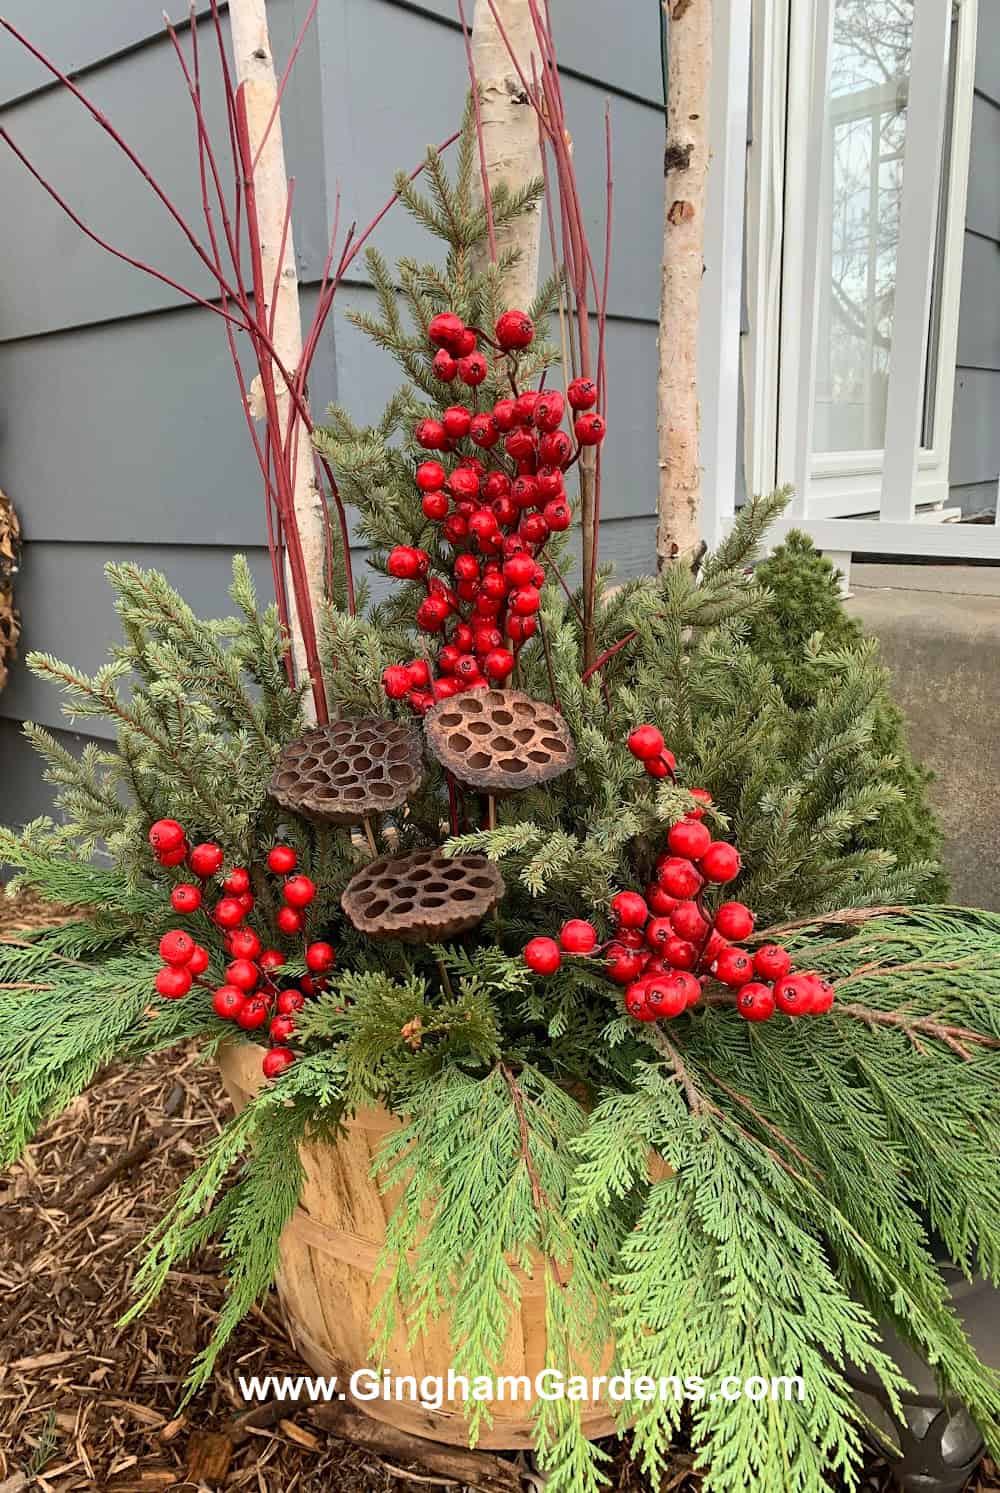
To make it a little more festive for the Christmas season, I like to add a pop of color with red berries. By the way, I paid a little more for these waterproof decorative berries that are made for outdoor use. I’ve been able to reuse them for a few years now. Also, this evergreen basket includes items that I’ve used in previous years, such as birch poles, red twigs and lotus pods. Adding clear string lights is also a great way to make your winter planter a focal point on your front porch.
Taking Care of Your DIY Winter Planter
If you live where there are freezing temperatures during the winter months, you will find that your winter pots are fairly low maintenance. Because of our cold weather, after the initial watering, I usually don’t have to water my winter containers for the rest of the winter season. They freeze quickly and that keeps the greenery stable. If you are in warmer climates, you will need to water your winter containers to keep the greens from turning brown.
Tips for Making Your Winter Planter Last
Let’s reiterate a few important steps here that will help your planters last well into winter:
- Unless you’re working with fresh-cut greenery, clip the end of the stems and soak them in a bucket of water before you start arranging.
- Once you have the evergreens in your container, spray them with Wilt Stop or Wilt Pruf.
- When your planter is assembled, water it well and keep it watered until it freezes. Again, for those of you who live where there are mild winters and you don’t get a hard freeze, you’ll need to continue watering your winter planter.
Winter Window Box
I’ve always wanted a window box, so when we moved to our current fixer upper home, I could immediately picture a window box under our big front window, so my handy hubs built one. I love being able to add flowers or greenery to decorate it for all four seasons. The real snow is an added bonus!

Little cardinals live on both ends.

Here it is all lit up in the evening. We love these candles. They came with a timer and a remote, plus they flicker like real candles.

If you don’t have the time or the energy, or it’s just too cold where you live, there’s absolutely nothing wrong with using faux greenery. It’s also perfectly fine to use a mix of real and faux items in your winter container.
Winter Porch Pot Classes
Many garden centers offer winter planter classes. In my area, the classes are free, but you pay for supplies. I took one of those classes and I will share my experience.
- It was really hard to stay on a budget… there were so many amazing choices of things to add to your planter besides evergreens.
- My very simple winter planter cost way more than I would have spent on a premade planter.
- They did have some great tips and I enjoyed the hands-on demonstration.
- One of the things that I didn’t like was they had pots ready with spruce tips. I found that the spruce tips weren’t all that fresh and they didn’t last as long as I hoped they would.
I also enjoyed walking around and seeing what everyone else was making. Of course, my favorites were those that far exceeded my budget. Lol!
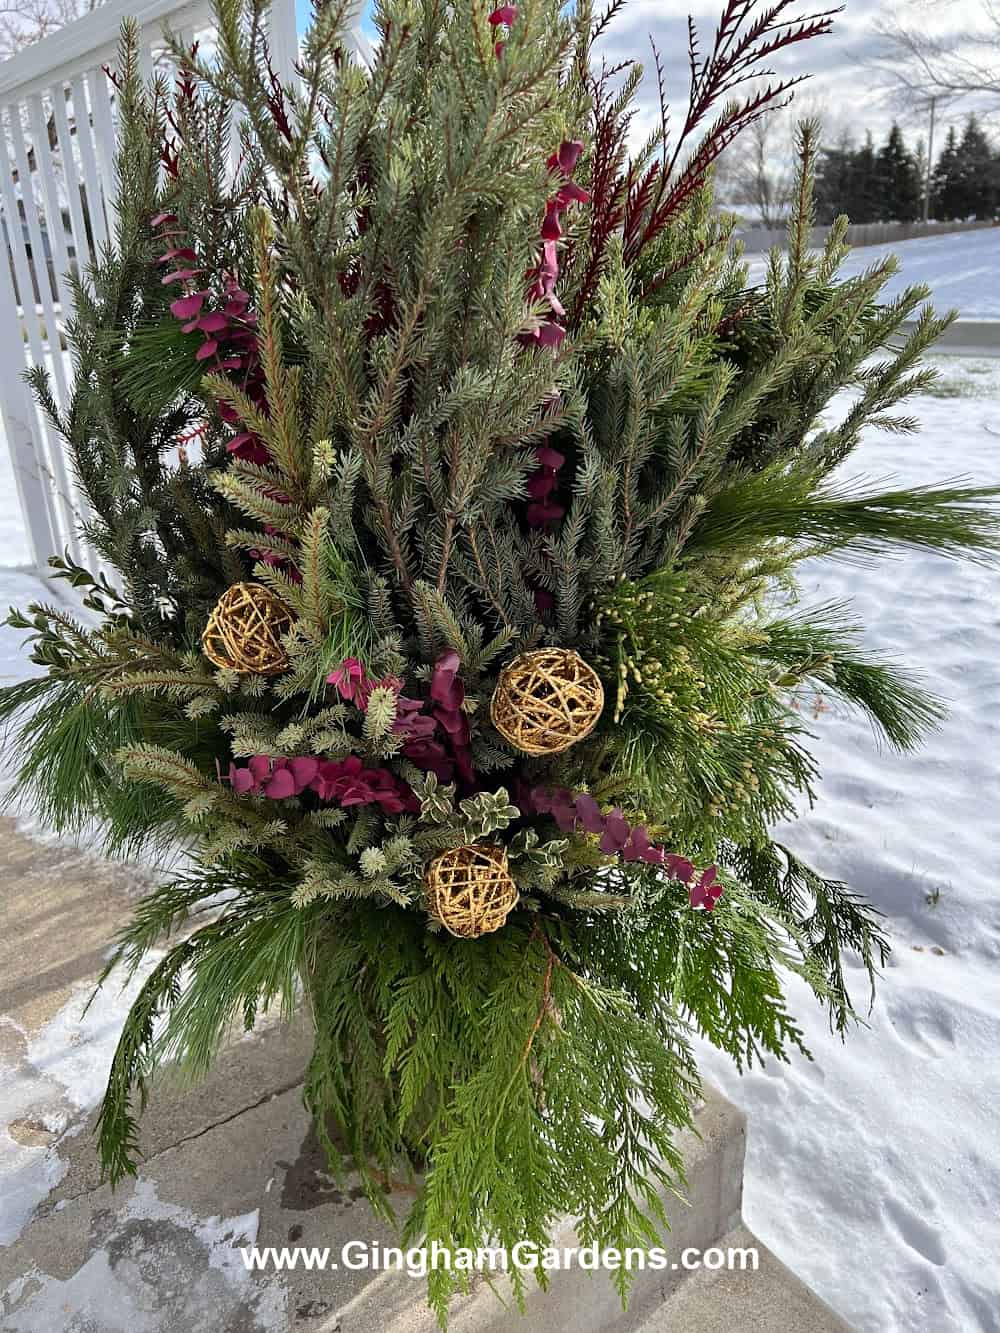
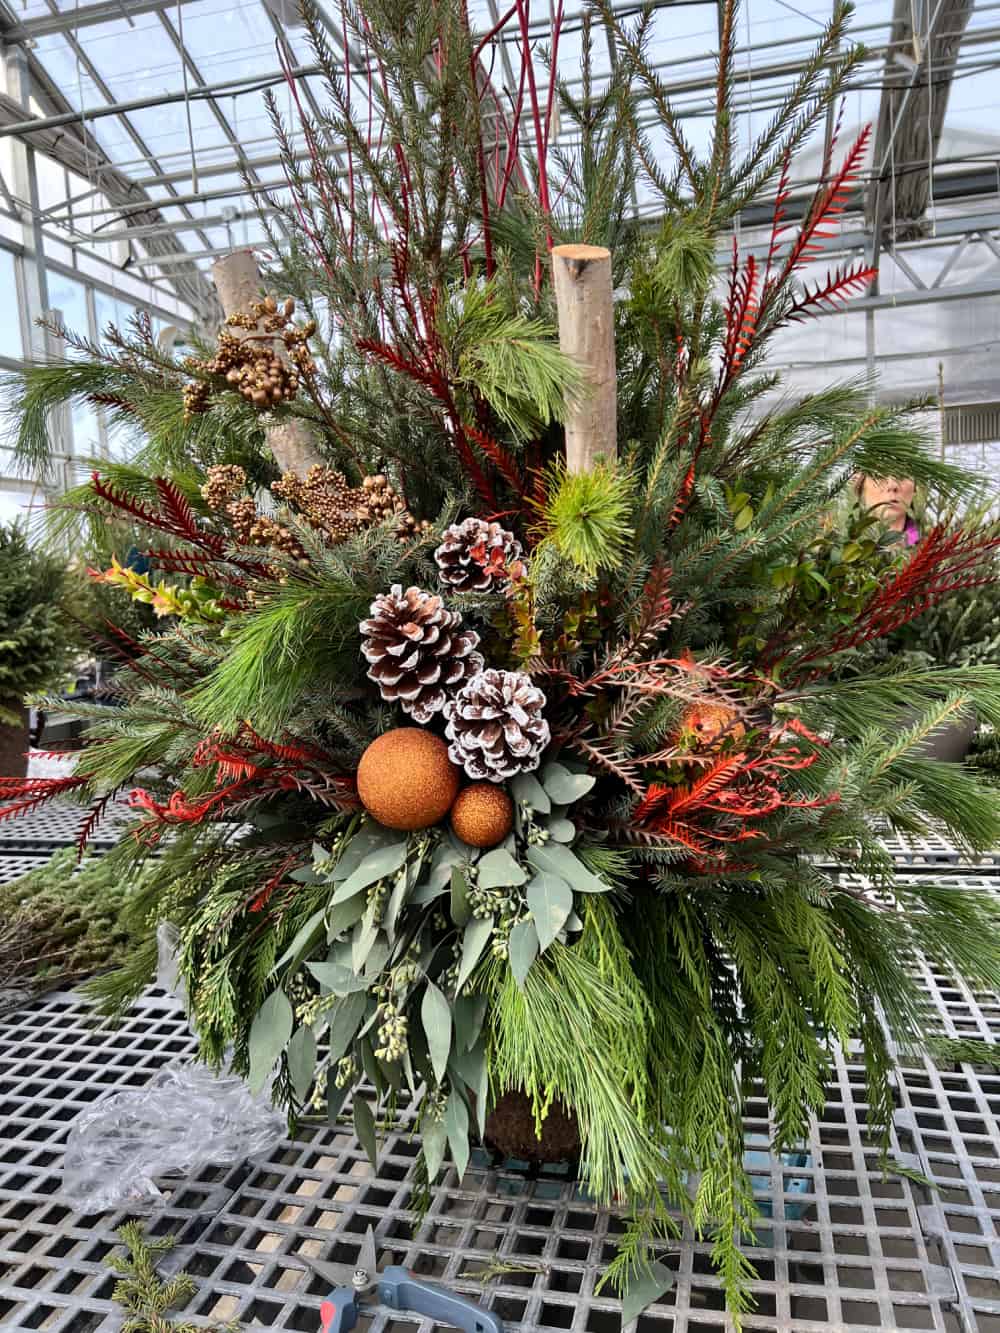
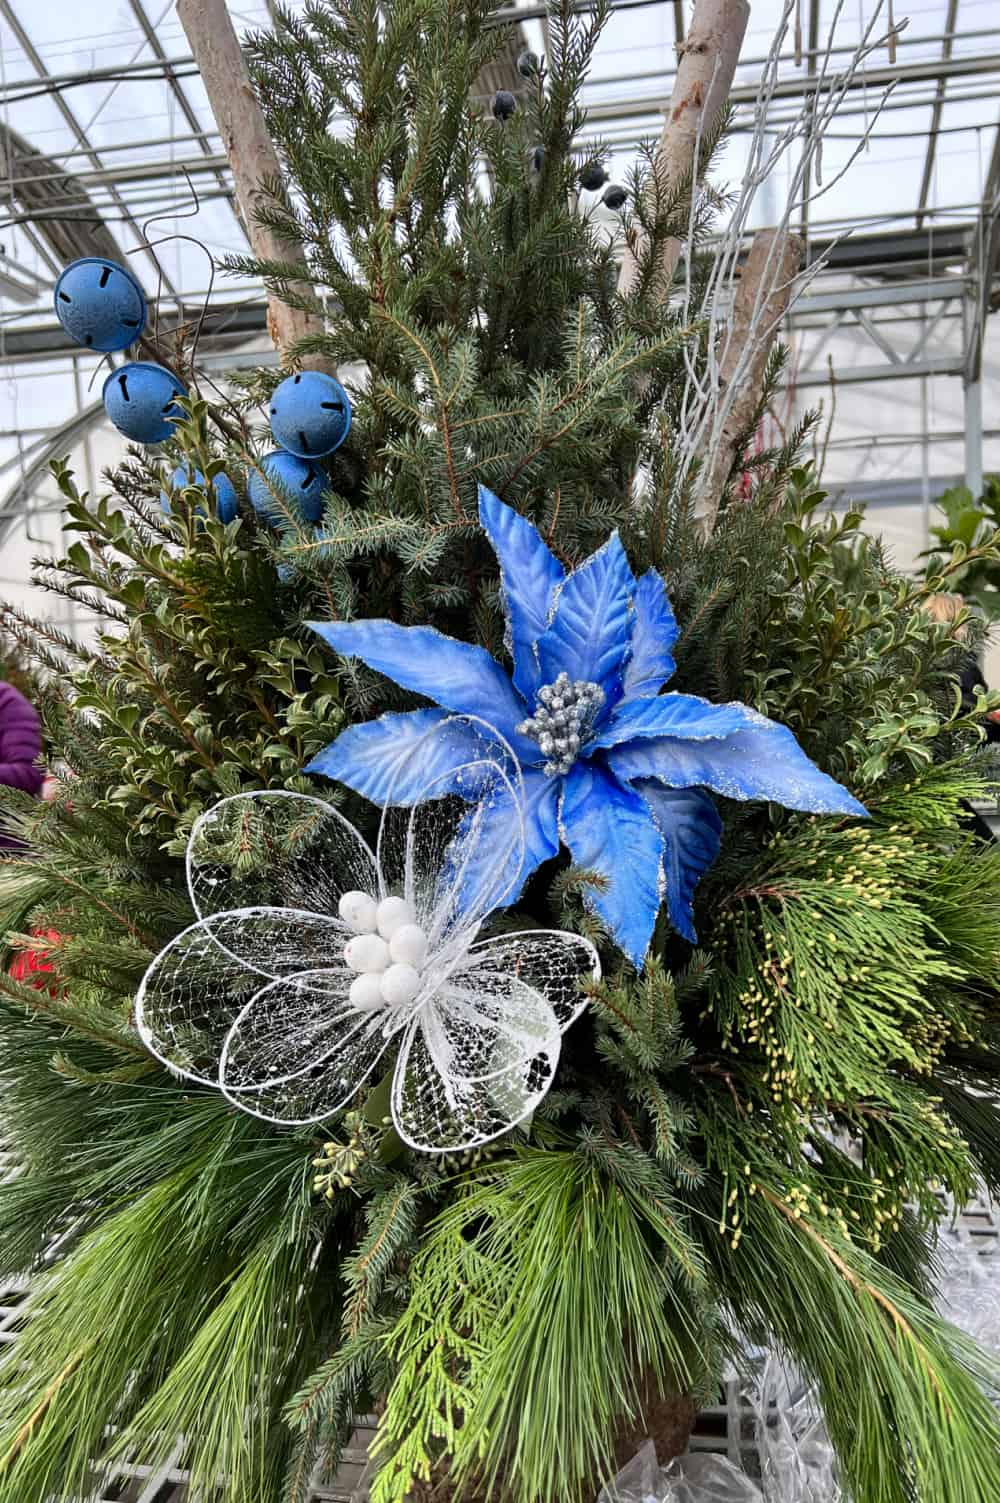
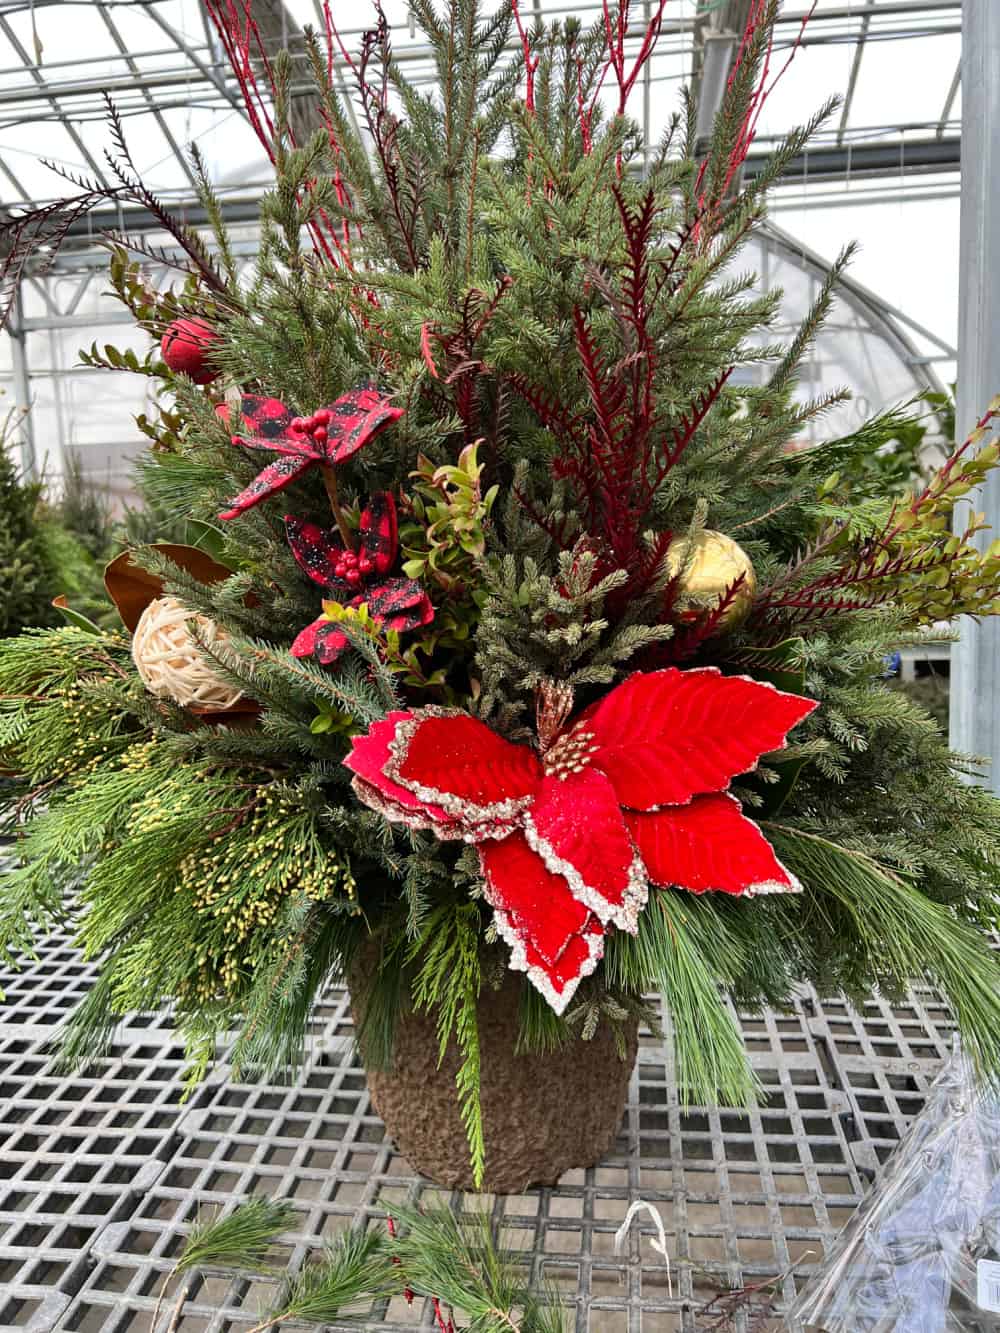
More Outdoor Winter Planter Ideas
I cannot take credit for the ideas below, these are simply pictures I took of winter containers at the class I took and various garden centers. This is a great way to come up with ideas though.
The variety in the planter below is stunning!

It would be fun to replicate the bells and floral pieces in this planter with a DIY.
Almost too much variety in this one, but nonetheless it’s beautiful.
A gorgeous winter planter at a local nursery. I didn’t even look at the price tag.

The picture below is totally my style and I thought about buying for a long time, but I took one for the budget and walked away. Yay me!

If you are a visual learner, this is a cute video on a garden center’s YouTube channel. It’s fun and you may find it helpful.
To see some more adorable and creative ideas for winter planters and outdoor decor, check out Winter Outdoor Decor – Use What You Have at Our Fairfield Home & Garden.
Thanks so much for stopping by Gingham Gardens today. I hope I’ve inspired you to try your hand at putting together your own Winter Container. What do you think, are you going to give it a try? Leave a comment and let me know.
More holiday DIY posts you’ll enjoy:
DIY Gifts From Your Garden
Natural Christmas Decorations
DIY Christmas Crafts Using Twigs
Christmas DIY Projects Using Tree Branches
In case it’s your first time here, Gingham Gardens is chock full of all kinds of gardening tips and ideas for both beginner gardeners, master gardeners and all those in between. We also have a fair amount of DIY posts and outdoor seasonal decorating posts.
Happy Winter Gardening and DIYing,
Julie
More Great Things on Gingham Gardens
Sign up to receive our weekly newsletters full of gardening tips. You’ll also get access to our Gardening Resources Library and all our helpful gardening printables.
More places to find Gingham Gardens:
- Visit Gingham Gardens on Pinterest.
- If you’re on Facebook, Gingham Gardens is also on Facebook.
- Love all things gardening? Check out our shop!
Save a pin to your gardening board on Pinterest, so you can remember this post later: