Practical Ways to Improve Your Garden Soil
Is your garden just ho-hum? No matter what you try (or didn’t try), your vegetables and flowers are just not flourishing. Chances are the problem is poor soil. Dirt matters in a garden!
Yes, it could be neglect, lack of water, not enough sun, lack of fertilizer or really anything, but the best way to insure success for your next gardening season is to work on your soil quality.
Without going into a bunch of chemistry, we’re going to keep this really simple and share practical ways to revitalize and improve your garden soil.
This post contains affiliate links. If you click on
one of the links and make a purchase,
I may receive a small commission at no additional cost to you.
See full disclosure here.
When is the Best Time to Amend Your Garden Soil
Anytime you can amend your gardening soil is good; before you plant, when you plant, in spring, in summer, etc. But, late summer or early fall is the best time; when there are so many organic materials, like leaves and garden waste, available.
I know, for those in northern zones it may be getting colder and not conducive to doing this now, but many are still experiencing warmer weather. Doing some amending of soil now will give it time to “cook” over the winter; things can have more time to decompose, etc, before planting time comes in the Spring.
Plus, at the end of the growing season, it’s easier to remember which areas of the garden didn’t do so well and which areas need the most help.
Testing Your Garden Soil
You know, not all gardeners test their soil. If you live in al place where the soil is working well, if it’s rich and loamy, it will not be necessary to take this step. Of course, you might decide to have it tested out of curiosity or to see if you can make your soil even better!
Where we currently live, the soil on the property is quite sandy. As I’ve done in the past and continue to do, when creating a new garden plot, just keep adding compost and taking the steps that are talked about in this article.
Each year the soil will improve and you will find these ways of amending garden soil are working well for your gardens. That being said, I still think it’s a good idea to have a soil test done, especially if you’re new to gardening, are starting a new garden, or you’ve never taken the time to do it.
You can learn so much more about what type of soil you have and the amendments it needs.
Although it shouldn’t take the place of a real soil test, you can also purchase soil test kits. This soil test kit gets very good reviews.
Here are some soil ph and moisture meters that get great reviews. If you do decide to test your soil, below is a handy chart to tell you what to add if your soil deficient in one of these areas.
Natural amendments you can add to your soil once you know what it is needing:

There are all kinds of advice and ideas on the internet about adding banana peels, coffee grounds, antacid tablets, baking soda, etc. to make your plants bigger and better.
I highly recommend, before adding any of these substances to your garden soil, doing a garden soil test to see if your soil needs any of these nutrients. Just be alert as to whether the homemade concoctions you find on the internet are beneficial to your soil or the environment, and whether they are organic.
How to Amend Your Soil With Compost
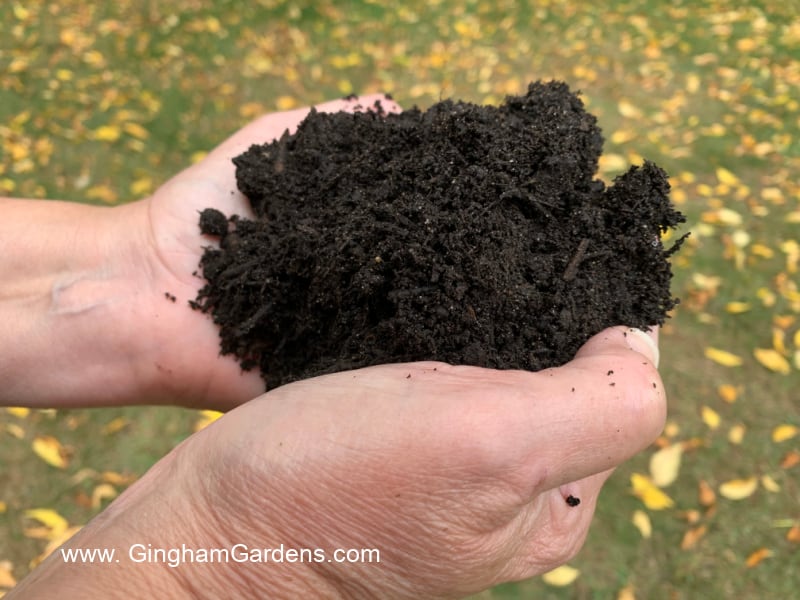
No matter what your soil structure is, whether you have clay soil or sandy soil, the key to healthy soil is amending it with compost.
Compost is simply decayed organic material and it serves to improve the overall structure and fertility of your soil. As well as helping soil hold moisture and nutrients. I’ll bet you’ve heard compost referred to as “black gold.”
Although I have Master Gardener experience, science and biology are just not my thing. Generally, I don’t want to wade through scientific stuff about composting, I just want to compost or get to the plants! So as always, I’m going to keep this simple enough for home gardeners.
Different Types of Composters
Compost Bins really help to make “black gold”. This dual bin composter works especially well! There are two different sides, so you can fill one up and it can start the decomposing process while you’re filling the other side up.
Since it’s up off the ground, it’s very easy to add materials to! It’s also super easy to turn and it’s rodent proof. Although small, it actually makes a surprising amount of compost. It’s perfect if you have a small yard or gardening space. It’s a great composter.
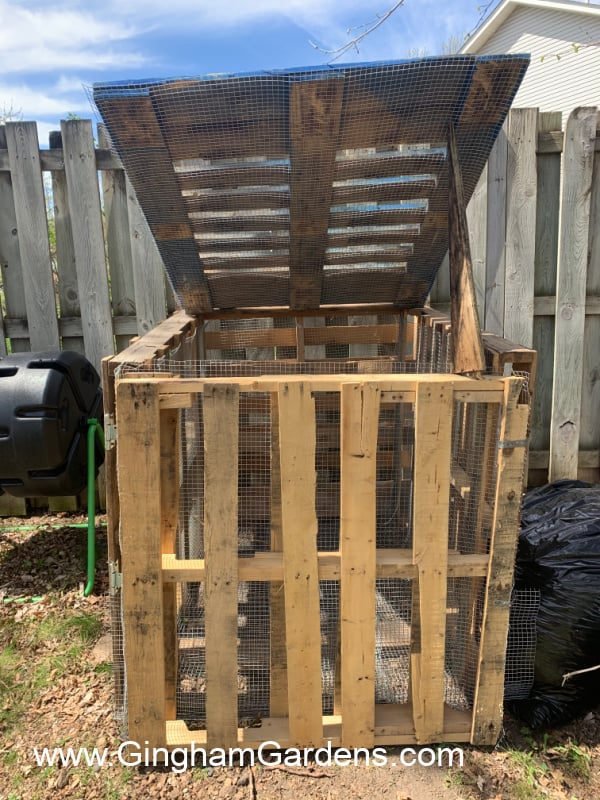
You can build a compost bin out of old wood pallets: it dosen’t have to be pretty! Because rodents can be a problem, line the inside with hardware cloth.
Add hinges to the top panel, so it can be propped open for you to add materials to the bin. Also, add hinges to one side of the front panel: then the aged compost can be emptied.
Even adding untreated grass clippings and shredded leaves, and only doing a minimal amount of turning, can result in the materials breaking down!You may be surprised to see pockets of fresh, earthy smelling compost in a relatively short time! I love that smell! It makes the happy endorphins go off in my brain.
Composting Made Simple
Composting can be very confusing, but as with most things in gardening, let’s not make it difficult. If you want to get into the science of composting, there are tons of complicated articles and compost recipes out there on the web. Basically, you need about 2/3rds brown stuff and 1/3rd green stuff.
Brown Stuff Includes:
- leaves
- paper
- cardboard
- paper towels
- small twigs
- etc.
Green Stuff Includes:
- untreated grass clippings NO BERMUDA GRASS or GRASS BURS
- fruit and vegetable kitchen scraps (no meat, bones)
- coffee grounds (yep, they’re considered green)
- plant foliage
- etc.
Your compost bin or pile should never be slimy or stinky! If it is, you’ve likely added too much green stuff or something you shouldn’t have added. If this happens, simply add in lots of brown stuff from the list above.
Likewise, if your compost pile or bin is dry, add more of the green stuff from the list above.
Composting this way is not quick, but it’s easy. There are also heat methods of composting, but they are expensive and are much more of a learning curve.
Things not to add to your compost:
Dog or cat poop, meat scraps or bones, cooked food scraps, dairy, etc. Although some do, I do not recommend throwing weeds into the compost. Also don’t put diseased plant material in the compost.
Here are a few ways to get your compost pile to break down more quickly:
- Water the pile if it becomes too dry.
- Use a garden fork (my favorite) and turn it.
- Place your compost bin in full sun.
- Shred the stuff you put in the compost pile or bin. I highly recommend shredding everything you put into your compost. It makes a huge difference in the time it takes for all the stuff to decompose. If you want to go crazy and you have lots of leaves and other soft yard waste that you want to put in your compost, then this leaf mulcher might be just what you could use!
- Add in compost starter.
Composting Kitchen Scraps to Amend Your Garden Soil
This countertop compost bin for fruit and vegetable scraps works really well to hold the scraps until they can be taken out to the compost bin.
It has a carbon filter on the top, so nothing gets stinky and there are no gnats to contend with. Additional carbon filters are also available for purchase.
Ideas for Soil Amendments (If You Don’t Have A Compost Bin or Compost Pile)
Since composting can be a long-term project, and your soil needs amending whether or not you have your own compost, there are other simple ways to amend your garden soil.
You can simply layer your vegetable beds with shredded leaves and grass clippings(once again, no Bermuda grass) in the fall. Shredded leaves and untreated grass clippings will decay somewhat during the winter and provide beneficial nutrients and organic matter for your gardening soil. In the spring this decayed plant material can be turned or tilled into the soil.
Here are a few ways to shred your yard waste. One way is to simply toss it on the lawn and mow over it. If you don’t have a lawn mower that bags, dump your yard waste into an old garbage can and use your weed trimmer to chop up the debris much like the mulcher mentioned above. Also, there are many leaf blower/vacuum/mulchers that also suck up and shred leaves.
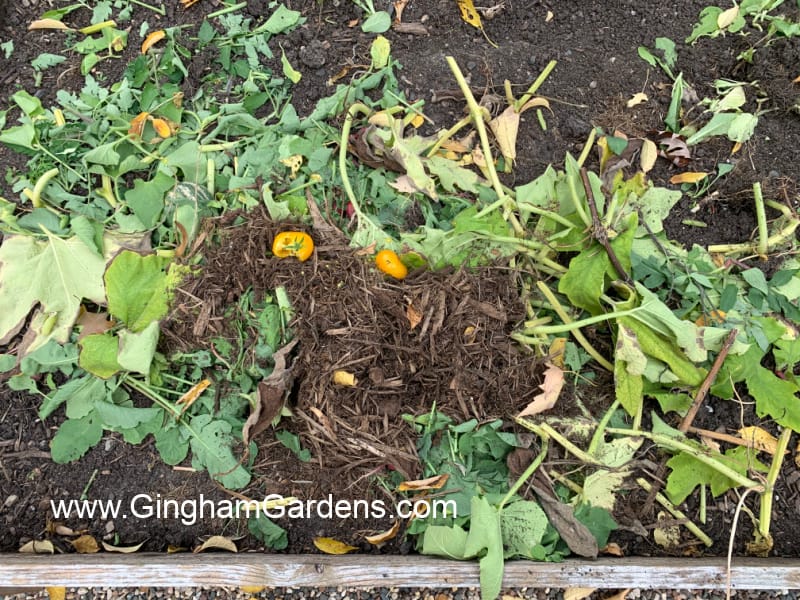
When you deadhead your flowers and clean them up by cutting back, simply leave the spent flowers and leaves in the garden. If I have big leaves like yellowed daffodil, tulip, hosta or daylily foliage, just take a few minutes to chop it up with my gardening shears and leave it where it falls. You can do the same thing in your vegetable gardens; just chop up plant foliage and over ripe veggies.
You could also dig a hole and bury the plant material (worms love this). I do this! You can also simply leave the plant material on top of the soil and then turn it under in the spring. This is called composting in place.
After reading up on it and seeing some great reviews, I’m trying worm castings (worm poop) for the first time this year. I simply add a handful to each hole, along with compost, as I plant new plants or transplant plant others. It’s a bit spendy, but my plants are worth it.
If you have access to aged (composted) animal manure (never use fresh manure, because it can burn your plants), it can also be a great way to amend your garden soil. I suggest reading up on it before you add it to your garden!
We have a mushroom production plant close by and can get lots of mushroom compost to add to soil for next to no cost, other than the cost of sweat labor to unload it.
Lastly, purchase bags of compost and manure. If you haven’t been able to make enough compost, this is a great solution. Bags of a mix of organic compost and animal manures can be purchased at a fairly inexpensive price at most big box stores and smaller hardware stores.
Every time I’m planting a new plant or transplanting, I carry along a bag of compost and add it to the area where I’m working. After several years of doing this, it’s beginning to pay off.
Mulching Your Garden Beds
If you’ve followed Gingham Gardens for any amount of time, you’ll know that I’m always harping about adding mulch to your garden beds. As a good shredded wood mulch breaks down into organic matter, it nourishes your garden soil.
Just a note here about mulches – wood chips are not the same as shredded wood mulch. They don’t break down like mulch does and they are usually too chunky to prevent weed growth.
If you don’t have the budget to purchase a good shredded wood mulch, shredded leaves work too. In my vegetable beds, I use dried, untreated grass clippings(Never Bermuda grass!).
Simply spread the mulch of your choice over the soil surface until you have a thick layer of 3 – 4 inches.
A Few More Tips for Improving Your Garden Soil
Are you a creature of habit and do you plant your vegetables garden the exact same way every year? Crop rotation is especially important in vegetable beds. It’s important to rotate crops at least every 3 years so the same crops aren’t growing in the same place year after year and sapping the soil of the same nutrients.
If you’ve been working on amending your garden soil and your soil doesn’t seem to be getting any better, you may want to consider raised bed gardening. It can be expensive to get started, but if you do it right, raised beds can last for many years. The best part, you control the soil you add to them.
If you have a huge vegetable garden, you might want to look into growing cover crops or green manures during the winter months.
For best results when fertilizing flowers or vegetables and for the health of your soil, use organic fertilizers, instead of synthetic fertilizers.
If you’re interested in a more scientific approach to composting, check out this article entitled All About Composting.
Although it’s fairly easy and inexpensive, improving your garden soil is not “one and done,” it’s a continuing process. Reviving and amending your garden soil should be just another step in the process of gardening. Whether you’re a seasoned gardener, a beginning gardener or all those in between, I hope you’ve learned some simple ways to start amending your garden soil.
More Articles on Gingham Gardens You’ll Enjoy:
Ways to Convert Lawn to Gardening Space
Flower Garden Maintenance Tips (lots of tips apply to veggie gardens too)
Garden Planning (How to Plan Next Year’s Garden)
DIY Garden Planner and Journal
We’d love to have you join us here at Gingham Gardens. There are tons of great gardening tips, inspiration and ideas, plus, the best gardening printables on the internet. Complete the form below to start your journey to planning and creating your best garden ever!
Thanks so much for stopping by Gingham Gardens today! I hope you’ve enjoyed your visit. Feel free to complete the comment form below if you have any questions or comments. Be sure to save the pins below to your favorite gardening board on Pinterest.
Happy gardening,
Julie
More places to find Gingham Gardens:
- Visit Gingham Gardens on Pinterest.
- If you’re on Facebook, Gingham Gardens is also on Facebook.
- Love all things gardening? Check out our shop!
Save a pin to your gardening board on Pinterest, so you can remember this post later: