DIY Chalkboard Sign – Fast & Simple
After planting a bunch of daylilies and daffodil bulbs on my day off this week, I took a little break from gardening to make this fast and simple chalkboard sign. I’m a fairly creative, crafty person, but seriously anyone can make a chalkboard sign. To my gardening readers, hang with me I still have lots more gardening projects and tutorials to share through the fall and winter, but every now and then I will share a craft post too.
This post contains affiliate links. If you click on
one of the links and make a purchase,
I may receive a small commission
at no additional cost to you. Thanks so much!
Product List – Chalkboard Signs
This is the chalkboard I used.

These are the chalk markers I used.

![]()

![]()
I used my trusty Silhouette Cameo to cut out vinyl stencils. I seriously love, love, love this sweet die cutting machine and could not imagine my crafting life without it. However, you do not need a die cutting machine to make this chalkboard craft. There are tons of stencils available on Amazon (see below), or you can purchase stencils at your favorite craft store. If you have a steady hand and can do lettering, you can even freehand it. I will just add here that I’m jealous of you people that can do beautiful freehand lettering. The beauty of using the Silhouette Cameo or hand lettering is that you can put any saying you want on your chalkboard sign.
Instructions – Chalkboard Signs
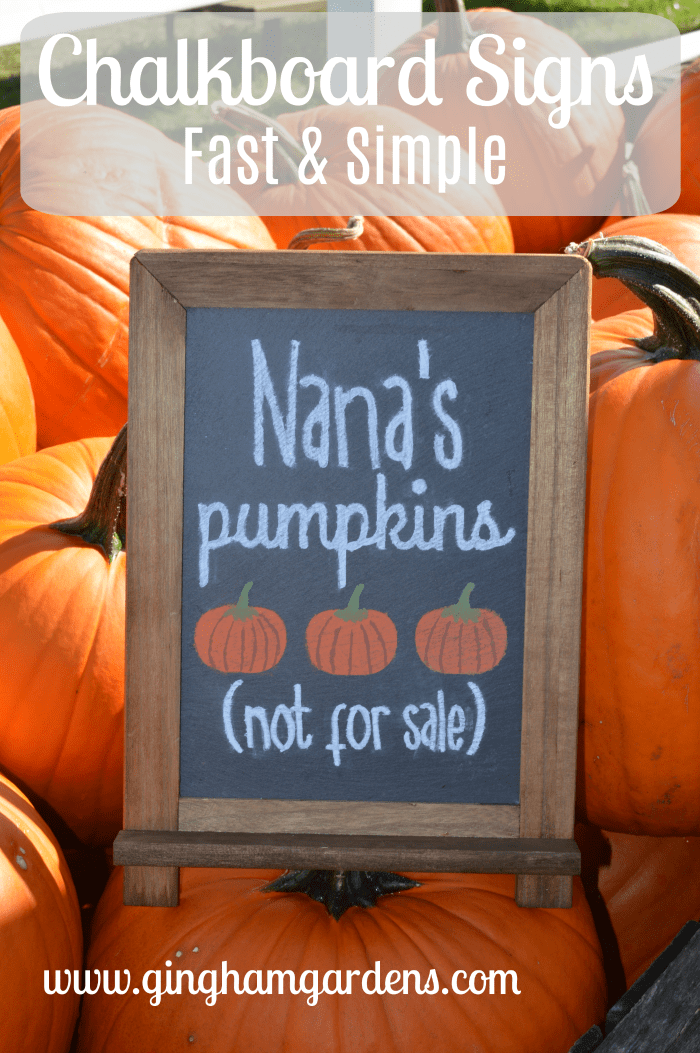
First, I adhered my stencil to the chalkboard. If you made your stencil on the Silhouette Cameo, the vinyl stencil will just stick to the chalkboard. If you’re using a reusable stencil like the one pictured below, spray a very light coating of adhesive on the back and adhere it to the chalkboard.
Next, once you have your stencil adhered good to the chalkboard, simply take your chalk marker and fill in the letters and/or shapes. Once you’ve gone over everything and allowed it to dry for a few minutes (the VersaChalk markers dry very quickly), see if there are any spots that you want to go over again. After waiting about 5 minutes, simply pull up the stencil and voila there you have it.
The chalkboard I used was fairly rough, so I did have to clean up some spots where the marker bled under my stencil. To clean this up, I just used cotton swabs dampened on the end with water. These chalk markers are very forgiving and easy to clean up mistakes. In fact, if you don’t like your design, you can simply clean your board with water and a sponge and start over. Or, when you want to change the saying for a different season, or different saying, just clean it off and start again.
So see, chalkboard signs are very simple. It really adds an exclusive personal touch to your home decor, wedding decor, baby or wedding shower decor, menu boards for large or small events, etc. Really the list is endless.
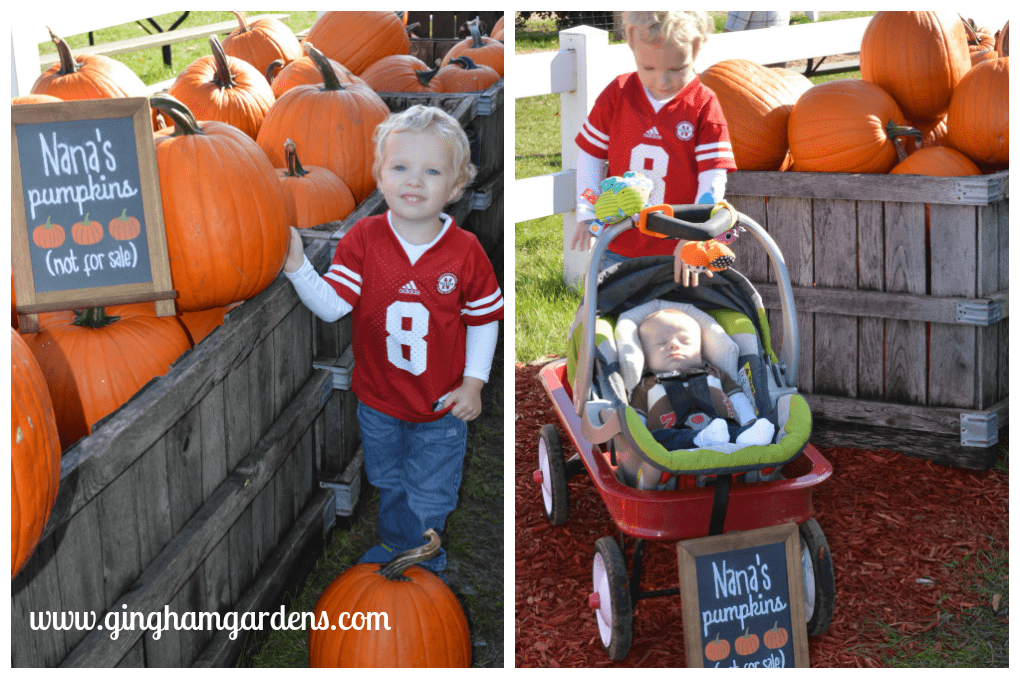
I had great expectations of having a really darling photo shoot with my grand buddies, but when you’re dealing with a 3 1/2 year old that needs a nap and a 3 month old that’s taking a nap, you just take what you can get. And, this Nana thinks her little buddies are just plain cute!
Here’s a bunch of cute stuff from Amazon to help you complete your very own Chalkboard Sign.
Thanks a bunch for stopping by today. I hope you enjoyed my post on DIY Chalkboard Signs. Whether you’re crafty or not, give it a try. Have you done any fall craft projects yet? It’s such a good feeling to create something you can use in your home or elsewhere.
If you haven’t already seen them, I have some great posts on outdoor decorating for fall. You can find those here and here. Hang around for a bit and share some ideas on Pinterest or Facebook, or leave a comment.
Thanks again and have a blessed day!
Joanna
